Difference between revisions of "AHM2012-Slicer-Python"
(→Qt) |
|||
| Line 55: | Line 55: | ||
=== VTK and MRML === | === VTK and MRML === | ||
| − | It is possible to | + | It is possible to use [http://www.vtk.org/Wiki/VTK/Python_Wrapping_FAQ VTK Python binding]. You can get ideas of what is possible from [http://www.itk.org/Wiki/VTK/Tutorials the VTK tutorials]. |
Revision as of 23:21, 7 January 2012
Home < AHM2012-Slicer-PythonContents
What is accessible via python
Qt
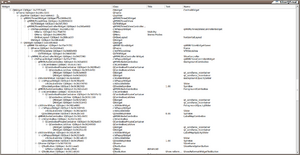
PythonQt exposes most of the Qt interface so that sophisticated interfaces can be easily created. PythonQt also allows introspection and modification of the interface at runtime.
import slicer

def widgetTree(root=""):
  if not root:
    root = slicer.util.mainWindow()
  global treeItems
  tree = qt.QTreeWidget()
  tree.setHeaderLabels(["Widget", "Class", "Title", "Text", "Name"])
  treeItems = {}
  treeItems[root] = qt.QTreeWidgetItem(tree)
  parents = [root]
  while parents != []:
    widget = parents.pop()
    if not widget:
      break
    widgetItem = qt.QTreeWidgetItem(treeItems[widget])
    children = widget.children()
    for child in children:
      treeItems[child] = widgetItem
    parents += children
    widgetItem.setText(0, str(widget))
    try:
      widgetItem.setText(1, widget.className())
    except AttributeError:
      pass
    try:
      widgetItem.setText(2, widget.title)
    except AttributeError:
      pass
    try:
      widgetItem.setText(3, widget.text)
    except AttributeError:
      pass
    try:
      widgetItem.setText(4, widget.name)
    except AttributeError:
      pass
  tree.setGeometry(100, 100, 1000, 500)
  tree.setColumnWidth(0,200)
  tree.setColumnWidth(0,300)
  tree.expandAll()
  tree.show()
  return tree
VTK and MRML
It is possible to use VTK Python binding. You can get ideas of what is possible from the VTK tutorials.
Because MRML and most of the slicer functionality is written as VTK subclasses, they are available in python via the same mechanism.
class EndoscopyPathModel:
  """Create a vtkPolyData for a polyline:
       - Add one point per path point.
       - Add a single polyline
  """
  def __init__(self, path, fiducialListNode):

    fids = fiducialListNode
    scene = slicer.mrmlScene

    points = vtk.vtkPoints()
    polyData = vtk.vtkPolyData()
    polyData.SetPoints(points)

    lines = vtk.vtkCellArray()
    polyData.SetLines(lines)
    linesIDArray = lines.GetData()
    linesIDArray.Reset()
    linesIDArray.InsertNextTuple1(0)

    polygons = vtk.vtkCellArray()
    polyData.SetPolys( polygons )
    idArray = polygons.GetData()
    idArray.Reset()
    idArray.InsertNextTuple1(0)

    for point in path:
      pointIndex = points.InsertNextPoint(*point)
      linesIDArray.InsertNextTuple1(pointIndex)
      linesIDArray.SetTuple1( 0, linesIDArray.GetNumberOfTuples() - 1 )
      lines.SetNumberOfCells(1)

    # Create model node
    model = slicer.vtkMRMLModelNode()
    model.SetScene(scene)
    model.SetName("Path-%s" % fids.GetName())
    model.SetAndObservePolyData(polyData)

    # Create display node
    modelDisplay = slicer.vtkMRMLModelDisplayNode()
    modelDisplay.SetColor(1,1,0) # yellow
    modelDisplay.SetScene(scene)
    scene.AddNodeNoNotify(modelDisplay)
    model.SetAndObserveDisplayNodeID(modelDisplay.GetID())

    # Add to scene
    modelDisplay.SetPolyData(model.GetPolyData())
    scene.AddNode(model)

    # Camera cursor
    sphere = vtk.vtkSphereSource()
    sphere.Update()

    # Create model node
    cursor = slicer.vtkMRMLModelNode()
    cursor.SetScene(scene)
    cursor.SetName("Cursor-%s" % fids.GetName())
    cursor.SetAndObservePolyData(sphere.GetOutput())

    # Create display node
    cursorModelDisplay = slicer.vtkMRMLModelDisplayNode()
    cursorModelDisplay.SetColor(1,0,0) # red
    cursorModelDisplay.SetScene(scene)
    scene.AddNodeNoNotify(cursorModelDisplay)
    cursor.SetAndObserveDisplayNodeID(cursorModelDisplay.GetID())

    # Add to scene
    cursorModelDisplay.SetPolyData(sphere.GetOutput())
    scene.AddNode(cursor)

    # Create transform node
    transform = slicer.vtkMRMLLinearTransformNode()
    transform.SetName('Transform-%s' % fids.GetName())
    scene.AddNode(transform)
    cursor.SetAndObserveTransformNodeID(transform.GetID())

    self.transform = transform
Numpy
Slicer also comes bundled with numpy so many interesting array operations are easy to perform on image data.
Here's an excerpt from a working example:
    #
    # Get the numpy array for the bg and label
    #
    import vtk.util.numpy_support
    backgroundImage = backgroundNode.GetImageData()
    labelImage = labelNode.GetImageData()
    shape = list(backgroundImage.GetDimensions())
    shape.reverse()
    backgroundArray = vtk.util.numpy_support.vtk_to_numpy(backgroundImage.GetPointData().GetScalars()).reshape(shape)
    labelArray = vtk.util.numpy_support.vtk_to_numpy(labelImage.GetPointData().GetScalars()).reshape(shape)
CLI Modules
It is also possible to invoke slicer command line modules from python. These can be written in any language, but often rely on ITK for processing. In the near future SimpleITK should be available directly inside slicer. See the Slicer4 Python page for examples.
Here's an example from the Editor Module that calls the ModelMaker CLI:
  def onApply(self):
    #
    # create a model using the command line module
    # based on the current editor parameters
    #

    volumeNode = self.editUtil.getLabelVolume()
    if not volumeNode:
      return

    #
    # set up the model maker node
    #

    parameters = {}
    parameters['Name'] = self.modelName.text
    parameters["InputVolume"] = volumeNode.GetID()
    parameters['FilterType'] = "Sinc"

    # build only the currently selected model.
    parameters['Labels'] = self.getPaintLabel()
    parameters["StartLabel"] = -1
    parameters["EndLabel"] = -1

    parameters['GenerateAll'] = False
    parameters["JointSmoothing"] = False
    parameters["SplitNormals"] = True
    parameters["PointNormals"] = True
    parameters["SkipUnNamed"] = True

    if self.smooth.checked:
      parameters["Decimate"] = 0.25
      parameters["Smooth"] = 10
    else:
      parameters["Decimate"] = 0
      parameters["Smooth"] = 0

    #
    # output
    # - make a new hierarchy node if needed
    #
    numNodes = slicer.mrmlScene.GetNumberOfNodesByClass( "vtkMRMLModelHierarchyNode" )
    outHierarchy = None
    for n in xrange(numNodes):
      node = slicer.mrmlScene.GetNthNodeByClass( n, "vtkMRMLModelHierarchyNode" )
      if node.GetName() == "Editor Models":
        outHierarchy = node
        break

    if not outHierarchy:
      outHierarchy = slicer.vtkMRMLModelHierarchyNode()
      outHierarchy.SetScene( slicer.mrmlScene )
      outHierarchy.SetName( "Editor Models" )
      slicer.mrmlScene.AddNode( outHierarchy )

    parameters["ModelSceneFile"] = outHierarchy

    modelMaker = slicer.modules.modelmaker

    #
    # run the task (in the background)
    # - use the GUI to provide progress feedback
    # - use the GUI's Logic to invoke the task
    # - model will show up when the processing is finished
    #
    self.CLINode = slicer.cli.run(modelMaker, self.CLINode, parameters)

    self.statusText( "Model Making Started..." )
Using the console
(See J2's excellent demo video)
The python console in Slicer4:
- is a Qt widget that is part of CTK's extensions to PythonQt
- has syntax highlighting
- has command completion
- provides handy access for testing and experimenting
Writing a Scripted Module
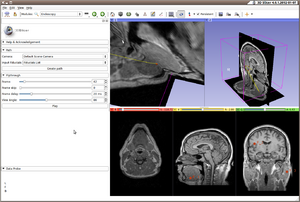
The Endoscopy module is a good example to look at for writing a scripted module.
You can get started by using the ModuleWizard to create your skeleton module.
Then you implement the functionality using the methods described above:
- Use PythonQt to create the interface
- Implement the Logic with vtk/vtkITK/CLI Modules
- Access MRML Data via numpy
Refining the code and UI with slicerrc
Slicer supports a user-specific startup script called slicerrc
- Can be either in ~/.slicerrc.py or in location pointed to by SLICERRC environment variable
- Can do arbitrary startup actions:
- load data
- change the GUI
- initiate computation
In practice, it is very convenient for developers to use the this feature to make shortcuts for interacting with their code.
See https://github.com/pieper/SlicerRC for examples that you can build from.
Here's an excerpt from that example:
def endoscopy():
  print "SlicerRC - endoscopy setup..."
  import imp, sys, os
  endoPath = '%s/../../Slicer4/Modules/Scripted/Scripts' % slicer.app.slicerHome
  if not sys.path.__contains__(endoPath):
    sys.path.insert(0,endoPath)

  mod = "Endoscopy"
  sourceFile = endoPath + "/Endoscopy.py"
  fp = open(sourceFile, "r")
  globals()[mod] = imp.load_module(mod, fp, sourceFile, ('.py', 'r', imp.PY_SOURCE))
  fp.close()

  globals()['e'] = e = globals()[mod].EndoscopyWidget()


def setupMacros():
  """Set up hot keys for various development scenarios"""

  import qt
  global endoscopy

  macros = (
    ("Shift+Ctrl+2", endoscopy),
    )

  for keys,f in macros:
    k = qt.QKeySequence(keys)
    s = qt.QShortcut(k,mainWindow())
    s.connect('activated()', f)
    s.connect('activatedAmbiguously()', f)
    print "SlicerRC - '%s' -> '%s'" % (keys, f.__name__)

# Install macros
if mainWindow(verbose=False): setupMacros()
What this does is:
- Registers a hot-key for the application so that when Control-Shift-2 is entered the endoscopy() python function is invoked
- This hot-key reloads the source code for the module and creates a new instance of the module GUI
- The module GUI is accessible via the python console in a global variable 'e'
- The the 'e' variable lets you access internal state, call methods, and otherwise debug your module.
- You can typically edit the module python code and reload the module with Control-Shift-2 without exiting slicer, making the development process very efficient
Limitations of python
Although python gives almost everything you need to write a full-featured slicer module, there are some things you cannot do:
- PythonQt does not allow you to inherit from QWidget, so you need to build interfaces by composition rather than inheritance (although you can use python inheritance to organize your code).
- Computation in python is slower than C++, so most of your numerical and graphical code should be written in C++ can exposed to python via one of several mechanisms:
- Write a CLI module
- Write a VTK class to implement the function
- Write an ITK class to implement the function and wrap it via vtkITK
- Write an ITK class to implement the function and wrap it via SimpleITK (coming soon)
- Python provides many libraries and modules, but not all are available with slicer
- scipy is a large collection of code that is not easy to compile across platforms (enthought sells compiled versions so users won't need to compile it themselves)
- matplotlib is not available in slicer
- ipython is not available in slicer (yet)
- Some aspects of the underlying Qt, VTK, CTK, APIs are not exposed via python. Usually this isn't an issue but it can sometimes bite you.

