Difference between revisions of "Slicer3.2:Training"
m (Text replacement - "http://www.slicer.org/slicerWiki/index.php/" to "https://www.slicer.org/wiki/") |
|||
| (30 intermediate revisions by 8 users not shown) | |||
| Line 1: | Line 1: | ||
__NOTOC__ | __NOTOC__ | ||
= Welcome to the 3D Slicer3.2 User Training 101= | = Welcome to the 3D Slicer3.2 User Training 101= | ||
| − | The information on this page applies to '''3D Slicer version 3'''. If you are looking for materials about Slicer version 2, please visit the [http://wiki.na-mic.org/Wiki/index.php/Slicer:Workshops:User_Training_101 Slicer2 101 page]. | + | *The information on this page applies to '''3D Slicer version 3.2'''. |
| + | **If you are looking for materials about Slicer version 3.6, please visit the [https://www.slicer.org/wiki/Slicer3.6:Training#Software_tutorials Slicer3.6 training page] | ||
| + | **If you are looking for materials about Slicer version 3.4, please visit the [https://www.slicer.org/wiki/Slicer3.4:Training#Software_tutorials Slicer3.4 training page] | ||
| + | **If you are looking for materials about Slicer version 2, please visit the [http://wiki.na-mic.org/Wiki/index.php/Slicer:Workshops:User_Training_101 Slicer2 101 page]. | ||
{| border="00" cellpadding="5" cellspacing="0" | {| border="00" cellpadding="5" cellspacing="0" | ||
|- | |- | ||
| − | | rowspan="2"| | + | | rowspan="2" align="left"| |
* Slicer 3 has been designed as | * Slicer 3 has been designed as | ||
** an easy-to-use application for 3D image analysis and visualization, | ** an easy-to-use application for 3D image analysis and visualization, | ||
| Line 13: | Line 16: | ||
*'''For questions about the materials on this page, please send an e-mail to Sonia Pujol, Ph.D. (spujol at bwh.harvard.edu)'''. | *'''For questions about the materials on this page, please send an e-mail to Sonia Pujol, Ph.D. (spujol at bwh.harvard.edu)'''. | ||
| − | | style="background: #ebeced" colspan="2" align="center"| <b>[ | + | | style="background: #ebeced" colspan="2" align="center"| <b>[https://www.slicer.org/wiki/Slicer3:Slicer3Brand Slicer Logo]</b> |
|- | |- | ||
| style="background: #ebeced"|[[Image:3DSlicerLogo-H-Color-424x236.png|center|250px|Slicer logo]] | | style="background: #ebeced"|[[Image:3DSlicerLogo-H-Color-424x236.png|center|250px|Slicer logo]] | ||
| Line 22: | Line 25: | ||
=Training Compendium= | =Training Compendium= | ||
| − | {| border="1" cellpadding="5" | + | {| border="1" cellpadding="5" width="1200px" |
|- style="background:#BBE9E2; color:black" align="left" | |- style="background:#BBE9E2; color:black" align="left" | ||
| − | | style="width:5%" | '''Category | + | | style="width:5%" | '''Category''' |
| style="width:35%" | '''Tutorial''' | | style="width:35%" | '''Tutorial''' | ||
| style="width:30%" | '''Sample Data''' | | style="width:30%" | '''Sample Data''' | ||
| style="width:10%" | '''Image''' | | style="width:10%" | '''Image''' | ||
|- | |- | ||
| − | | style="background:#9BF2C5; color:black" align="Center"| '''1.1''' | + | | style="background:#9BF2C5; color:black" align="Center"| <span id="1.1"></span> '''1.1''' |
| − | | style="background:#D1FFF9; color:black"| [[Media: | + | | style="background:#D1FFF9; color:black"| [[Media:3DVisualization_SoniaPujol_Munich2008_2.ppt| Data Loading and 3D Visualization in Slicer3 ]] |
| − | | style="background:#D1FFF9; color:black"| [http://www.na-mic.org/Wiki/index.php/Image:SlicerSampleVisualization.tar.gz SlicerSampleVisualization.tar.gz] <br> [http://www.na-mic.org/Wiki/index.php/ | + | | style="background:#D1FFF9; color:black"| [http://www.na-mic.org/Wiki/index.php/Image:SlicerSampleVisualization.tar.gz SlicerSampleVisualization.tar.gz] <br> [http://www.na-mic.org/Wiki/index.php/media:SlicerSampleVisualization.zip SlicerSampleVisualization.zip ] |
| style="background:#C3D1C3; color:black" align="Center"| [[Image:SceneRestore.png|200px|LoadingandVisualization]] | | style="background:#C3D1C3; color:black" align="Center"| [[Image:SceneRestore.png|200px|LoadingandVisualization]] | ||
|- | |- | ||
| − | | style="background:#9BF2C5; color:black" align="Center"| '''1.2''' | + | | style="background:#9BF2C5; color:black" align="Center"| <span id="1.2"></span> '''1.2''' |
| + | | style="background:#D1FFF9; color:black"| [[Media:Manual Segmentation with 3DSlicer-mj.ppt| Manual segmentation with 3D Slicer]] | ||
| + | | style="background:#D1FFF9; color:black"| | ||
| + | | style="background:#C3D1C3; color:black" align="Center"| [[Image:OrbitSegmentationt.png|200px]] | ||
| + | |- | ||
| + | | style="background:#9BF2C5; color:black" align="Center"| <span id="1.3"></span> '''1.3''' | ||
| style="background:#D1FFF9; color:black"| [[Media:AutomaticSegmentation_SoniaPujol_Munich2008.ppt|EM Segmentation Course]]<br> | | style="background:#D1FFF9; color:black"| [[Media:AutomaticSegmentation_SoniaPujol_Munich2008.ppt|EM Segmentation Course]]<br> | ||
Background Materials:[[EMSegmenter| EMSegmenter History]] | Background Materials:[[EMSegmenter| EMSegmenter History]] | ||
| − | | style="background:#D1FFF9; color:black"|[[Media:AutomaticSegmentation.tar.gz|AutomaticSegmentation.tar.gz]] | + | | style="background:#D1FFF9; color:black"|[[Media:AutomaticSegmentation.tar.gz|AutomaticSegmentation.tar.gz]]<br> |
| + | [[Media:AutomaticSegmentation.zip | AutomaticSegmentation.zip ]] | ||
| + | |||
| style="background:#C3D1C3; color:black" align="Center"| [[Image:EMSegmentation2008.png|200px|EM Segmenter]] | | style="background:#C3D1C3; color:black" align="Center"| [[Image:EMSegmentation2008.png|200px|EM Segmenter]] | ||
|- | |- | ||
| − | | style="background:#9BF2C5; color:black" align="Center"| '''1. | + | | style="background:#9BF2C5; color:black" align="Center"| <span id="1.4"></span> '''1.4''' |
| style="background:#D1FFF9; color:black"|[[Media:Na-MIC-Slicer-Registration.ppt|Affine and Deformable Registration in Slicer 3]] | | style="background:#D1FFF9; color:black"|[[Media:Na-MIC-Slicer-Registration.ppt|Affine and Deformable Registration in Slicer 3]] | ||
| − | | style="background:#D1FFF9; color:black"| [[Media:SlicerSampleRegistration.tgz|SlicerSampleRegistration.tgz]] | + | | style="background:#D1FFF9; color:black"| [[Media:SlicerSampleRegistration.tgz | SlicerSampleRegistration.tgz]]<br> |
| + | [[Media:SlicerSampleRegistration.zip |SlicerSampleRegistration.zip]] | ||
| style="background:#C3D1C3; color:black" align="Center"| [[Image:Na-MIC-Slicer-Registration.png|200px|SlicerRegistration]] | | style="background:#C3D1C3; color:black" align="Center"| [[Image:Na-MIC-Slicer-Registration.png|200px|SlicerRegistration]] | ||
|- | |- | ||
| − | | style="background:#9BF2C5; color:black" align="Center"| '''1. | + | | style="background:#9BF2C5; color:black" align="Center"| <span id="1.5"></span> '''1.5''' |
| style="background:#D1FFF9; color:black"| [[Media:slicer3diffusionTutorial7.pdf| Processing of Diffusion Weighted Imaging and Diffusion Tensor Imaging data in Slicer3]]<br> | | style="background:#D1FFF9; color:black"| [[Media:slicer3diffusionTutorial7.pdf| Processing of Diffusion Weighted Imaging and Diffusion Tensor Imaging data in Slicer3]]<br> | ||
Background Materials:[http://slicer.org/slicerWiki/index.php/Slicer3:DTMRI DT-MRI module]. | Background Materials:[http://slicer.org/slicerWiki/index.php/Slicer3:DTMRI DT-MRI module]. | ||
| Line 52: | Line 63: | ||
| style="background:#C3D1C3; color:black" align="Center"| [[Image:Line-glyph-tracts.jpg|200px|Glyphs and tracts]] | | style="background:#C3D1C3; color:black" align="Center"| [[Image:Line-glyph-tracts.jpg|200px|Glyphs and tracts]] | ||
|- | |- | ||
| − | | style="background:#9BF2C5; color:black" align="Center"| '''1. | + | | style="background:#9BF2C5; color:black" align="Center"| <span id="1.6"></span> '''1.6''' |
| style="background:#D1FFF9; color:black"| [[Media:Slicer3Training ChangeTracker.ppt| Detecting subtle change in pathology]] <br> | | style="background:#D1FFF9; color:black"| [[Media:Slicer3Training ChangeTracker.ppt| Detecting subtle change in pathology]] <br> | ||
This tutorial consists of two MR scans of a patient with meningioma. | This tutorial consists of two MR scans of a patient with meningioma. | ||
| Line 58: | Line 69: | ||
| style="background:#C3D1C3; color:black" align="Center"| [[Image:TumorGrowth-Tutorial-Image.png|200px|Meningioma Case]] | | style="background:#C3D1C3; color:black" align="Center"| [[Image:TumorGrowth-Tutorial-Image.png|200px|Meningioma Case]] | ||
|- | |- | ||
| − | | style="background:#9BF2C5; color:black" align="Center"| '''1. | + | | style="background:#9BF2C5; color:black" align="Center"| <span id="1.7"></span> '''1.7''' |
| − | | style="background:#D1FFF9; color:black"| [ | + | | style="background:#D1FFF9; color:black"| [[media:Slicer3Training_WhiteMatterLesions_v2.3.pdf |Detecting white matter lesions in lupus]] <br> |
| − | This tutorial | + | This tutorial teaches how to use an automated, multi-level method to segment white matter brain lesions in lupus. |
| − | | style="background:#D1FFF9; color:black"|[ | + | | style="background:#D1FFF9; color:black"|Lupus Tutorial Data [[Media:LesionSegmentationTutorialData.tgz|(.tgz)]][[media:LesionSegmentationTutorialData.zip| (.zip)]]<br> |
| − | | style="background:#C3D1C3; color:black" align="Center"| [[Image: | + | | style="background:#C3D1C3; color:black" align="Center"| [[Image:3dLupusLesionVolume.png|200px|Lesion Segmentation]] |
|- | |- | ||
| − | | style="background:#9BF2C5; color:black" align="Center"| '''1. | + | | style="background:#9BF2C5; color:black" align="Center"| <span id="1.8"></span> '''1.8''' |
| − | | style="background:#D1FFF9; color:black"| [ | + | | style="background:#D1FFF9; color:black"| [[Media:FreeSurferCourse_SoniaPujol.ppt|FreeSurfer Course]] <br> |
This tutorial teaches how to visualize FreeSurfer segmentations and parcellation maps of the brain. | This tutorial teaches how to visualize FreeSurfer segmentations and parcellation maps of the brain. | ||
| − | | style="background:#D1FFF9; color:black"|[http://www.na-mic.org/Wiki/index.php/Image:FreeSurferData.tar.gz FreeSurfer Tutorial Data ] | + | | style="background:#D1FFF9; color:black"|[http://www.na-mic.org/Wiki/index.php/Image:FreeSurferData.tar.gz FreeSurfer Tutorial Data ] <br> [[media:FreeSurferTutorialData.zip|FreeSurferTutorialData.zip]] |
| style="background:#C3D1C3; color:black" align="Center"| [[Image:FreeSurferParcellation.PNG|200px|FreeSurfer segmentation]] | | style="background:#C3D1C3; color:black" align="Center"| [[Image:FreeSurferParcellation.PNG|200px|FreeSurfer segmentation]] | ||
|- | |- | ||
| − | | style="background:#8EDEB5; color:black" align="Center"| '''2.1''' | + | | style="background:#8EDEB5; color:black" align="Center"| <span id="2.1"></span> '''2.1''' |
| style="background:#D1FFF9; color:black"| [[media:ProgrammingIntoSlicer3_SoniaPujol.ppt |Programming into Slicer3]] | | style="background:#D1FFF9; color:black"| [[media:ProgrammingIntoSlicer3_SoniaPujol.ppt |Programming into Slicer3]] | ||
This tutorial is intended for engineers and scientists who want to integrate stand-alone programs outside of the Slicer3 source tree. | This tutorial is intended for engineers and scientists who want to integrate stand-alone programs outside of the Slicer3 source tree. | ||
| − | | style="background:#D1FFF9; color:black"| [[Media: | + | | style="background:#D1FFF9; color:black"| [[Media:HelloWorld_Plugin.zip| HelloWorld_Plugin.zip ]] |
| + | |||
| style="background:#C3D1C3; color:black" align="Center"| [[Image:ProgrammingCourse_Logo.PNG|200px|Programming]] | | style="background:#C3D1C3; color:black" align="Center"| [[Image:ProgrammingCourse_Logo.PNG|200px|Programming]] | ||
|- | |- | ||
| − | | style="background:#8EDEB5; color:black" align="Center"| '''2.2''' | + | | style="background:#8EDEB5; color:black" align="Center"| <span id="2.2"></span> '''2.2''' |
| style="background:#D1FFF9; color:black"| [[Media:ImageGuidedTherapyPlanning.pdf|Image Guided Therapy Planning Tutorial]]<br> | | style="background:#D1FFF9; color:black"| [[Media:ImageGuidedTherapyPlanning.pdf|Image Guided Therapy Planning Tutorial]]<br> | ||
This tutorial takes the trainee through a complete workup for neurosurgical patient specific mapping.See pages 58 to 80 of this tutorial on using the '''"Simple region growing"''' segmentation module. | This tutorial takes the trainee through a complete workup for neurosurgical patient specific mapping.See pages 58 to 80 of this tutorial on using the '''"Simple region growing"''' segmentation module. | ||
| Line 83: | Line 95: | ||
| style="background:#C3D1C3; color:black" align="Center"| [[Image:NeurosurgicalPlanningOverview.png|200px|Neurosurgical Planning Overview]] | | style="background:#C3D1C3; color:black" align="Center"| [[Image:NeurosurgicalPlanningOverview.png|200px|Neurosurgical Planning Overview]] | ||
|- | |- | ||
| − | | style="background:#72b291; color:black" align="Center"| '''3.1''' | + | | style="background:#72b291; color:black" align="Center"| <span id="3.1"></span> '''3.1''' |
| style="background:#D1FFF9; color:black"| [http://wiki.na-mic.org/Wiki/index.php/IGT:ToolKit Slicer3 as a research tool for image guided therapy research (IGT)] | | style="background:#D1FFF9; color:black"| [http://wiki.na-mic.org/Wiki/index.php/IGT:ToolKit Slicer3 as a research tool for image guided therapy research (IGT)] | ||
This tutorial is intended for engineers and scientists who want to use Slicer 3 for IGT research. | This tutorial is intended for engineers and scientists who want to use Slicer 3 for IGT research. | ||
| Line 89: | Line 101: | ||
| style="background:#C3D1C3; color:black" align="Center"| [[Image:Slicer IGTL NITRobot.jpg|200px|Slicer with robots]] | | style="background:#C3D1C3; color:black" align="Center"| [[Image:Slicer IGTL NITRobot.jpg|200px|Slicer with robots]] | ||
|- | |- | ||
| − | | style="background:#72b291; color:black" align="Center"| '''3.2''' | + | | style="background:#72b291; color:black" align="Center"| <span id="3.2"></span> '''3.2''' |
| style="background:#D1FFF9; color:black"| [[Media:Brain Atlas Tutorial08.ppt| SPL-PNL Brain Atlas Tutorial]] | | style="background:#D1FFF9; color:black"| [[Media:Brain Atlas Tutorial08.ppt| SPL-PNL Brain Atlas Tutorial]] | ||
This three-dimensional brain atlas dataset, derived from a volumetric, whole-head MRI scan, contains the original MRI-scan, a complete set of label maps, three-dimensional reconstructions (200+ structures) and a tutorial. <br> | This three-dimensional brain atlas dataset, derived from a volumetric, whole-head MRI scan, contains the original MRI-scan, a complete set of label maps, three-dimensional reconstructions (200+ structures) and a tutorial. <br> | ||
| Line 96: | Line 108: | ||
| style="background:#C3D1C3; color:black" align="Center"| [[Image:Atlas.png|200px|Brain Atlas]] | | style="background:#C3D1C3; color:black" align="Center"| [[Image:Atlas.png|200px|Brain Atlas]] | ||
|- | |- | ||
| − | | style="background:#72b291; color:black" align="Center"| '''3.3''' | + | | style="background:#72b291; color:black" align="Center"| <span id="3.3"></span> '''3.3''' |
| style="background:#D1FFF9; color:black"| [[Media:Abdominal_Atlas_Tutorial08.ppt| SPL Abdominal Atlas Tutorial]] | | style="background:#D1FFF9; color:black"| [[Media:Abdominal_Atlas_Tutorial08.ppt| SPL Abdominal Atlas Tutorial]] | ||
This three-dimensional abdominal atlas was derived from a computed tomography (CT) scan, using semi-automated image segmentation and three-dimensional reconstruction techniques. The dataset contains the original CT scan, detailed label maps, three-dimensional reconstructions and a tutorial. | This three-dimensional abdominal atlas was derived from a computed tomography (CT) scan, using semi-automated image segmentation and three-dimensional reconstruction techniques. The dataset contains the original CT scan, detailed label maps, three-dimensional reconstructions and a tutorial. | ||
| Line 103: | Line 115: | ||
| style="background:#C3D1C3; color:black" align="Center"| [[Image:Abdominal-Atlas-3Dsnapshot.png|200px|Abdominal Atlas]] | | style="background:#C3D1C3; color:black" align="Center"| [[Image:Abdominal-Atlas-3Dsnapshot.png|200px|Abdominal Atlas]] | ||
|- | |- | ||
| − | | style="background:#72b291; color:black" align="Center"| '''3.4''' | + | | style="background:#72b291; color:black" align="Center"| <span id="3.4"></span> '''3.4''' |
| style="background:#D1FFF9; color:black"| [http://slicer.spl.harvard.edu/slicerWiki/index.php/Slicer3:XND Using XNAT Desktop and Slicer3 for remote data handling ] | | style="background:#D1FFF9; color:black"| [http://slicer.spl.harvard.edu/slicerWiki/index.php/Slicer3:XND Using XNAT Desktop and Slicer3 for remote data handling ] | ||
This tutorial is intended for researchers who wish to upload local datasets to a remote XNAT repository like [http://central.xnat.org '''XNAT Central'''] and retrieve catalog files that can be opened inside Slicer. | This tutorial is intended for researchers who wish to upload local datasets to a remote XNAT repository like [http://central.xnat.org '''XNAT Central'''] and retrieve catalog files that can be opened inside Slicer. | ||
| Line 109: | Line 121: | ||
| style="background:#C3D1C3; color:black" align="Center"| [[Image:XNDmanage2.png|200px|XNAT Desktop Manager]] | | style="background:#C3D1C3; color:black" align="Center"| [[Image:XNDmanage2.png|200px|XNAT Desktop Manager]] | ||
|- | |- | ||
| − | | style="background:#72b291; color:black" align="Center"| '''3.5''' | + | | style="background:#72b291; color:black" align="Center"| <span id="3.5"></span> '''3.5''' |
| style="background:#D1FFF9; color:black"| '''Harnessing Grid Computational Resources and integration with Slicer through the Grid Wizard Enterprise system''' | | style="background:#D1FFF9; color:black"| '''Harnessing Grid Computational Resources and integration with Slicer through the Grid Wizard Enterprise system''' | ||
These tutorials are intended for researchers who wish to utilize distributed computational resources. | These tutorials are intended for researchers who wish to utilize distributed computational resources. | ||
| Line 122: | Line 134: | ||
** [http://www.gridwizardenterprise.org/guides/config.html GWE Configuration Guide] | ** [http://www.gridwizardenterprise.org/guides/config.html GWE Configuration Guide] | ||
** [http://www.gridwizardenterprise.org/guides/user.html End Users Guide] | ** [http://www.gridwizardenterprise.org/guides/user.html End Users Guide] | ||
| − | ** [http://www. | + | | style="background:#C3D1C3; color:black" align="Center"| [[Image:GWE-overview.jpg|200px|GWE Overview]][http://www.youtube.com/watch?v=yXdRks5Wu5Q Featured Study Case (YouTube)] |
| − | + | |- | |
| − | + | | style="background:#72b291; color:black" align="Center"| <span id="3.6"></span> '''3.6''' | |
| − | | style="background:#C3D1C3; color:black" align="Center"| [[Image: | + | | style="background:#D1FFF9; color:black"| [http://www.youtube.com/watch?v=ebWqTHf5i5Y&hd=1 YouTube Video: Using "GWE's Record Set Explorer"] |
| + | This tutorial is intended for researchers who wish to interactively review local or remote datasets; such as input values of parameter exploration experiements, their output results, result sets of XNAT queries or any other type of dataset. | ||
| + | | style="background:#D1FFF9; color:black"| | ||
| + | |||
| + | * '''Sample data used in demo video:''' | ||
| + | * [http://www.oasis-brains.org/pdf/oasis_cross-sectional.csv OASIS Brain DB Cross Sectional Remote DataSet] | ||
| + | * [http://www.oasis-brains.org/pdf/oasis_longitudinal.csv OASIS Brain DB Longitudinal Remote DataSet] | ||
| + | |||
| + | * [http://www.gridwizardenterprise.org/rse '''RSE Project Site'''] | ||
| + | (there you can find: binaries, installation guides, source code, other useful documentation and project related information) | ||
| + | |||
| + | | style="background:#C3D1C3; color:black" align="Center"| [[Image:Rse-gwe-exp.gif|200px|RSE browsing through the results of a parameter exploration experiment]] | ||
|} | |} | ||
Latest revision as of 17:27, 10 July 2017
Home < Slicer3.2:TrainingWelcome to the 3D Slicer3.2 User Training 101
- The information on this page applies to 3D Slicer version 3.2.
- If you are looking for materials about Slicer version 3.6, please visit the Slicer3.6 training page
- If you are looking for materials about Slicer version 3.4, please visit the Slicer3.4 training page
- If you are looking for materials about Slicer version 2, please visit the Slicer2 101 page.
|
Slicer Logo | |
Software Installation
The Slicer download page contains links for downloading the different versions of Slicer 3.
Training Compendium
| Category | Tutorial | Sample Data | Image |
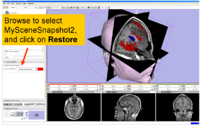
| 1.1 | Data Loading and 3D Visualization in Slicer3 | SlicerSampleVisualization.tar.gz SlicerSampleVisualization.zip |
|
| 1.2 | Manual segmentation with 3D Slicer | 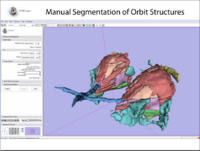
| |
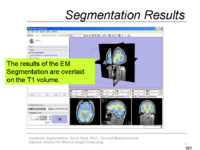
| 1.3 | EM Segmentation Course Background Materials: EMSegmenter History |
AutomaticSegmentation.tar.gz
|
|
| 1.4 | Affine and Deformable Registration in Slicer 3 | SlicerSampleRegistration.tgz |
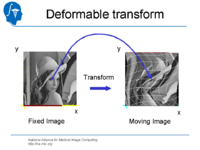
|
| 1.5 | Processing of Diffusion Weighted Imaging and Diffusion Tensor Imaging data in Slicer3 Background Materials:DT-MRI module. |
Slicer3DiffusionTutorialData.zip |
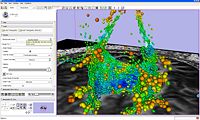
|
| 1.6 | Detecting subtle change in pathology This tutorial consists of two MR scans of a patient with meningioma. |
ChangeTracker-Tutorial-Data.zip | 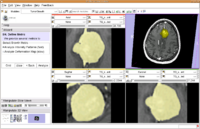
|
| 1.7 | Detecting white matter lesions in lupus This tutorial teaches how to use an automated, multi-level method to segment white matter brain lesions in lupus. |
Lupus Tutorial Data (.tgz) (.zip) |
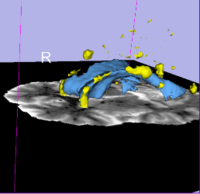
|
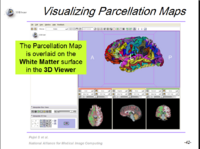
| 1.8 | FreeSurfer Course This tutorial teaches how to visualize FreeSurfer segmentations and parcellation maps of the brain. |
FreeSurfer Tutorial Data FreeSurferTutorialData.zip |
|
| 2.1 | Programming into Slicer3
This tutorial is intended for engineers and scientists who want to integrate stand-alone programs outside of the Slicer3 source tree. |
HelloWorld_Plugin.zip | 
|
| 2.2 | Image Guided Therapy Planning Tutorial This tutorial takes the trainee through a complete workup for neurosurgical patient specific mapping.See pages 58 to 80 of this tutorial on using the "Simple region growing" segmentation module.
|
NeurosurgicalPlanningTutorialData.zip | 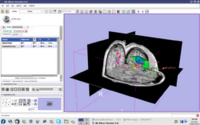
|
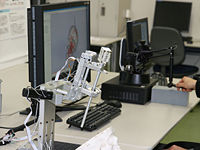
| 3.1 | Slicer3 as a research tool for image guided therapy research (IGT)
This tutorial is intended for engineers and scientists who want to use Slicer 3 for IGT research. |
| |
| 3.2 | SPL-PNL Brain Atlas Tutorial
This three-dimensional brain atlas dataset, derived from a volumetric, whole-head MRI scan, contains the original MRI-scan, a complete set of label maps, three-dimensional reconstructions (200+ structures) and a tutorial. |
SPL-PNL Brain Atlas | 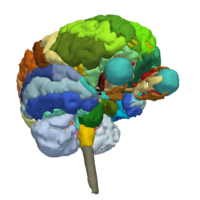
|
| 3.3 | SPL Abdominal Atlas Tutorial
This three-dimensional abdominal atlas was derived from a computed tomography (CT) scan, using semi-automated image segmentation and three-dimensional reconstruction techniques. The dataset contains the original CT scan, detailed label maps, three-dimensional reconstructions and a tutorial.
|
SPL Abdominal Atlas | 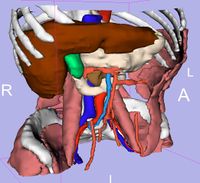
|
| 3.4 | Using XNAT Desktop and Slicer3 for remote data handling
This tutorial is intended for researchers who wish to upload local datasets to a remote XNAT repository like XNAT Central and retrieve catalog files that can be opened inside Slicer. |
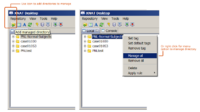
| |
| 3.5 | Harnessing Grid Computational Resources and integration with Slicer through the Grid Wizard Enterprise system
These tutorials are intended for researchers who wish to utilize distributed computational resources. |
Grid Wizard Enterprise
|
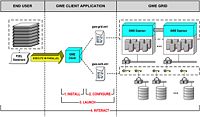 Featured Study Case (YouTube) Featured Study Case (YouTube)
|
| 3.6 | YouTube Video: Using "GWE's Record Set Explorer"
This tutorial is intended for researchers who wish to interactively review local or remote datasets; such as input values of parameter exploration experiements, their output results, result sets of XNAT queries or any other type of dataset. |
(there you can find: binaries, installation guides, source code, other useful documentation and project related information) |
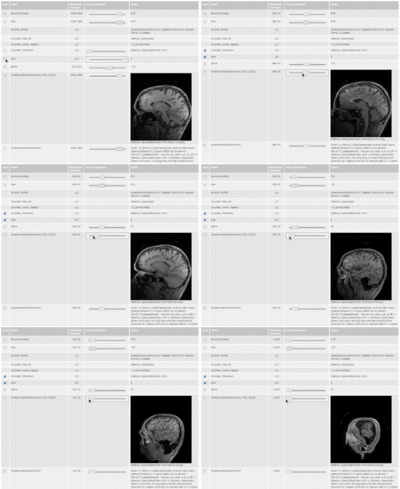
|
- Category 1 = Basic functionality
- Category 2 = Advanced functionality
- Category 3 = Specialized application packages
Additional Materials
For a variety of data sets for downloading, check the following link.
Back to Training:Main
