Difference between revisions of "2011 Winter Project Week:LandmarkRegularization"
| (3 intermediate revisions by the same user not shown) | |||
| Line 1: | Line 1: | ||
__NOTOC__ | __NOTOC__ | ||
<gallery> | <gallery> | ||
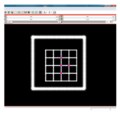
| − | File: | + | File:na-mic0.png|Slecer 3.6 panel |
| − | File: | + | File:na-mic1.png|Input reference image |
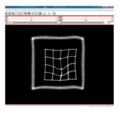
| − | File: | + | File:na-mic2.png|Input test image |
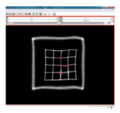
| + | File:na-mic3.png|Output warped image | ||
</gallery> | </gallery> | ||
<gallery> | <gallery> | ||
| − | File: | + | File:na-mic4.png|Input reference image |
| − | File: | + | File:na-mic5.png|Input test image |
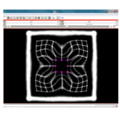
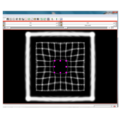
| − | File: | + | File:na-mic6.png|Output warped image without regularization |
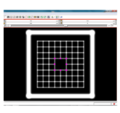
| + | File:na-mic7.png|Output warped image with regularization | ||
</gallery> | </gallery> | ||
| − | |||
| − | |||
| − | |||
| Line 48: | Line 47: | ||
<h3>Progress</h3> | <h3>Progress</h3> | ||
| + | |||
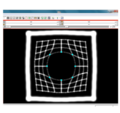
| + | We have implemented LANDWARP Landmark deformable registration command line module. It appears under All modules/Plastimatch as Input/Output panel. There you choose Fixed Volume which is a reference image, Moving Volume which is a test image that will be warped to match the reference image. You also choose Fixed Fiducials and Moving Fiducials which are fidicial lists you created for reference and test image respectively. Output Volume is where the warped image will be placed (you can create new or overwrite existing image). Then you can choose a type of landmark based algorithm, "tps" for global registration or "gauss" for local registration. Local registration requires RBF radius, Stiffness and Default Pixel Value which by default are 50 mm, 0, and -1000, respectively. After you click Apply button and wait until registration is done, the warped image will appear automatically in Slicer window. | ||
</div> | </div> | ||
</div> | </div> | ||
Latest revision as of 15:31, 14 January 2011
Home < 2011 Winter Project Week:LandmarkRegularization
Key Investigators
- MGH: Nadya Shusharina, Gregory Sharp
Objective
We are introducing a new method for local enhancement of image registration. The method is intended to make rapid, interactive corrections of local registration failures with a small number of mouse clicks. We use Gaussian radial basis functions (RBFs) to define a vector field from point landmarks, and apply regularization based on the vector field second order derivative.
Approach, Plan
Our approach is based on the fact that the Gaussian RBF has infinite support, but the influence of each RBF is localized, making this method well suited for local corrections. In addition, Gaussian RBFs have a distinct advantage over competing approaches such as Wendland functions, because the regularized vector field can be solved exactly with a simple equation. Algorithm for the landmark-based registration has been implemented as a part of out in-house software Plastimatch. We have validated the method on 10 large landmark sets. This work has been submitted for publication to IEEE Transactions on Medical Imaging.
Our plan for the project week is to implement our registration algorithm as a Slicer command line module.
Progress
We have implemented LANDWARP Landmark deformable registration command line module. It appears under All modules/Plastimatch as Input/Output panel. There you choose Fixed Volume which is a reference image, Moving Volume which is a test image that will be warped to match the reference image. You also choose Fixed Fiducials and Moving Fiducials which are fidicial lists you created for reference and test image respectively. Output Volume is where the warped image will be placed (you can create new or overwrite existing image). Then you can choose a type of landmark based algorithm, "tps" for global registration or "gauss" for local registration. Local registration requires RBF radius, Stiffness and Default Pixel Value which by default are 50 mm, 0, and -1000, respectively. After you click Apply button and wait until registration is done, the warped image will appear automatically in Slicer window.
Delivery Mechanism
This work will be delivered to the NA-MIC Kit as a (please select the appropriate options by noting YES against them below)
- ITK Module
- Slicer Module
- Built-in
- Extension -- commandline YES
- Extension -- loadable
- Other (Please specify)
References
- DIR-LAB. http://www.dir-lab.com
- Plastimatch. http://plastimatch.org

