Difference between revisions of "Slicer3:Volume Rendering"
From NAMIC Wiki
| Line 12: | Line 12: | ||
*Visualize grayscale volumes | *Visualize grayscale volumes | ||
*Create Visualization Parameter sets, load and save them | *Create Visualization Parameter sets, load and save them | ||
| − | *Use preset Visualization Parameter sets and link already created Parameter sets with current Volume | + | *Use preset Visualization Parameter sets and link already created Parameter sets with current Volume |
| + | *Edit parameters like shading; color , opacity and gradient transfer functions | ||
| + | *Interactive render rates, achieved through 3 step rendering | ||
| + | *Select different qualities of rendering and performance levels of rendering | ||
| + | *Receive exact progress about rendering | ||
==Future Features== | ==Future Features== | ||
Revision as of 19:41, 31 October 2007
Home < Slicer3:Volume RenderingContents
Overview
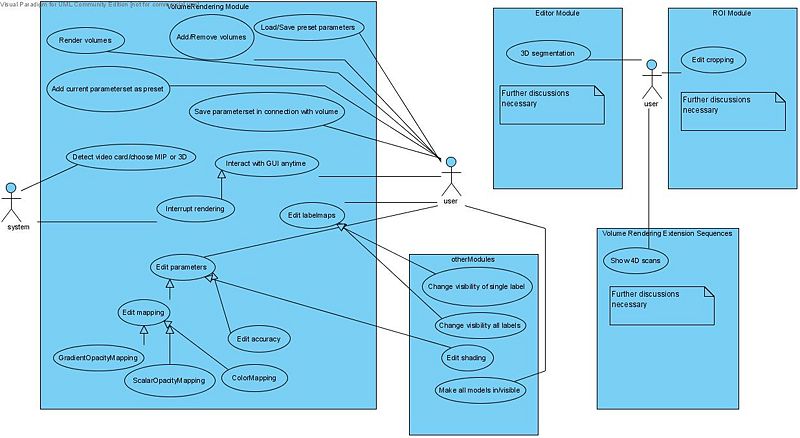
The topic of the new Volume Rendering Module is the integration of hardware accelerated volume rendering. There is a special focus of achieving interactive update rates, easy user interaction (e.g. by offering several presets) and the use of label maps. Goals also include incremental updates (if module is used with Editor module), saving and loading of the configuration etc.
Archtecture/Design
How to compile the module
- Switch the compile option "VolumeRenderingModule" on (in cmake)
- Make sure that you recompile "Slicer3.cxx"
- Compile
Current Features
- Visualize grayscale volumes
- Create Visualization Parameter sets, load and save them
- Use preset Visualization Parameter sets and link already created Parameter sets with current Volume
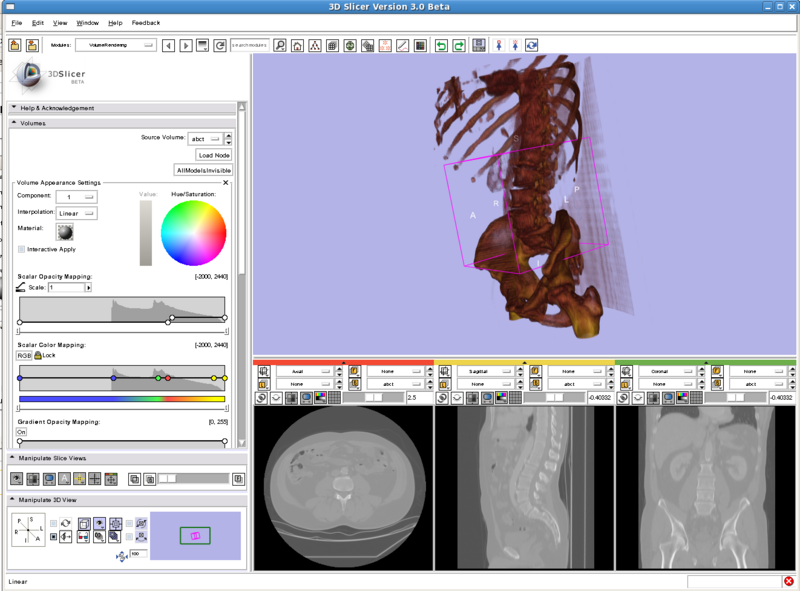
- Edit parameters like shading; color , opacity and gradient transfer functions
- Interactive render rates, achieved through 3 step rendering
- Select different qualities of rendering and performance levels of rendering
- Receive exact progress about rendering
Future Features
How to use the module
Latest results and limitations
Description
- Loading changing of MRML-Nodes is possible during runtime
- At the moment no removing of MRML-Nodes possible
- Change properties (Shading, Interpolation, mapping)
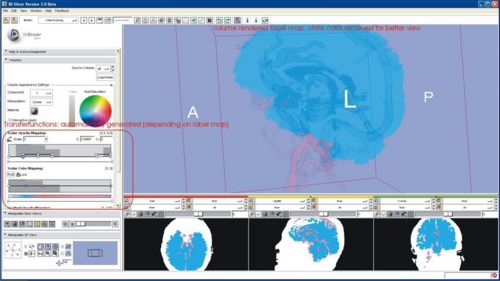
- Calculate transfer functions automatically
- Performance:
- Interrupting is possible in render window.
- Interrupting somewhere else requires platform dependent coding (q.v. problems)
- Cropping is possible
Screenshots
next Tasks
Goals
Volume rendering presets :
- MIP (Maximum Intensity Projection)
- CT Bone and vessel
- Use Hounsfield units
- Bone +400->+1000
- Soft tissue +40->+80
- Water 0
- Fat -60->-100
- Lung -400->-600
- Air -1000
- Problem with Vessels: Different contrast mediums?!
- Use Hounsfield units
- T1 MR Air/skin interface
- Label map per-label object rendering
Slicer3 module interface:
- Select from loaded volumes
- Specify preset transfer functions or use KWWidgets tools
Slicer3 internals:
- Correct coordinates including transforms
- Level of detail rendering
- Proper integration with surface rendering
Different Volume Rendering Algorithms
- RayCast
- 2D Texture Mapping
- 3D Texture Mapping
- ...
Wish List
- 2D Transfer functions - may require specialized opengl code integrated with VTK. Talk with Gordon about latest work from Utah.
- use glTexSubImage3D so that incremental changes to the volume can be quickly reflected
- use distance maps (inlcude several components) in rendering
Glossar
- Visualization Parameter Set


