Difference between revisions of "SlicerOnBIRN"
| Line 46: | Line 46: | ||
[[image:namic-file-space.png|150px|thumb|SRB File Space for NAMIC project]] | [[image:namic-file-space.png|150px|thumb|SRB File Space for NAMIC project]] | ||
| − | Use the MetaDataUtils to search for files of a particular type. Select the "search" icon [[image: | + | Use the MetaDataUtils to search for files of a particular type. Select the "search" icon [[image:Search-icon.png]]. Search on any of the following fields. |
DataStatus \in (1---meaning?) | DataStatus \in (1---meaning?) | ||
Revision as of 19:01, 16 April 2007
Home < SlicerOnBIRNContents
Introduction
NA-MIC uses the BIRN infrastructure to store some data sets provided by Core 3. Some of those data sets are only for internal use by NA-MIC participants. There are also data sets that are available for anybody to use in their research. This page explains how to
- get an account for BIRN
- if you are a NA-MIC participant
- if you are not a NA-MIC participant
- find NA-MIC data on portal
- find available non-NA-MIC data on the portal
- launch Slicer from the portal to view the data
Getting a BIRN Portal Account
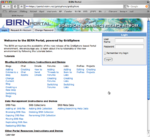
Visit the BIRN Portal, and click the tab labelled "Request an account". Fill out the appropriate information. Your account application will be reviewed by a human and verified. When your account has been accepted, you will be emailed an "activation link". Click on this link to view the portal as a registered user. The entire process usually takes less than a day. When logged in, you should be taken to the "My Space" page, which represents all of the projects that you have access to.
Getting access to NAMIC data
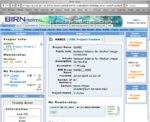
NAMIC data is stored as part of the "NAMIC" project within the BIRN Portal. In order to get access to the data, you need to be a member of the NAMIC project. If NAMIC is listed in your projects from your "My Space" page, you need to take no further action. If it is not listed, you simply need to join.
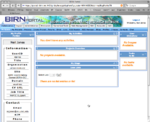
Visit the overall BIRN Projects page by clicking the "Projects" link in the "Collaboration" tab's submenu.
Search for the NAMIC project---the easiest approach is to hit ^F or Cmd-F (Mac) and type NAMIC.
On the right hand side is a column "Membership?". Click the "Request" link. You will receive an email stating that you have requested membership into the project.
When the project administrator has viewed your request and approved you, you will receive an email that you have been accepted into the project. Visiting the portal will allow you to complete the cycle, by clicking the "Accept" link.
Searching NAMIC data
From the "My Space" section, click on the NAMIC project in your "Projects Overview" tab.
Select "SRB Project Folders". From here, either browse for specific data (if you know what you're looking for) or search by meta data.
Use the MetaDataUtils to search for files of a particular type. Select the "search" icon ![]() . Search on any of the following fields.
. Search on any of the following fields.
DataStatus \in (1---meaning?)
Institution (obvious)
ScannerField <=> field strength, in Tesla
ScannerManufacturer (obvious)
ScannerModel (one of Echospeed...)
ScannerScanType (DTI (others?))
SubjectDiagnosis (one of Unknown...)
SubjectGroup (One of Unknown...)


