Difference between revisions of "Slicer Training Volume Rendering"
From NAMIC Wiki
| Line 12: | Line 12: | ||
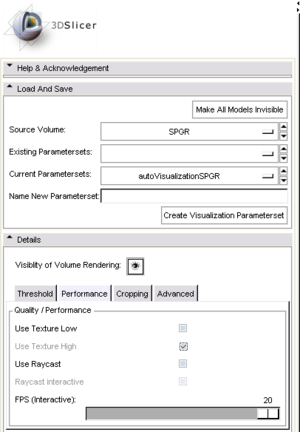
== Parameters == | == Parameters == | ||
| + | === Performance Triggers == | ||
[[Image:Slicer3_VolRen_Performance.png|thumb|none|Volume Rendering - Performance]] | [[Image:Slicer3_VolRen_Performance.png|thumb|none|Volume Rendering - Performance]] | ||
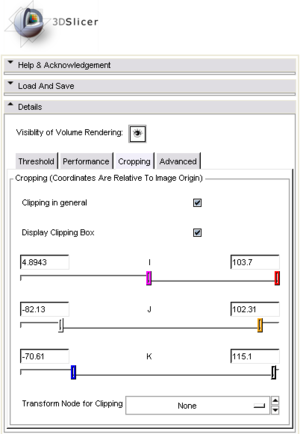
| + | === Cropping === | ||
[[Image:Slicer3_VolRen_Crop.png|thumb|none|Volume Rendering - Cropping]] | [[Image:Slicer3_VolRen_Crop.png|thumb|none|Volume Rendering - Cropping]] | ||
| + | === Advanced Options and the Transfer Function === | ||
[[Image:Slicer3_VolRen_Advanced.png|thumb|none|Volume Rendering - Advanced]] | [[Image:Slicer3_VolRen_Advanced.png|thumb|none|Volume Rendering - Advanced]] | ||
== Transfer Functions == | == Transfer Functions == | ||
Revision as of 17:21, 27 March 2008
Home < Slicer Training Volume RenderingContents
Volume Rendering
Get It Running
- To get volume rendering to work within 3D Slicer we have to make sure that a MRML node with Volumetric Data exists.
- If not a new set of volume data must be loaded. For this demo we will load the tutorial data found here.
- Download and Uncompress this folder
- In 3D Slicer go to File -> Load Scene
- Select the tutorial.xml
- Now select the VolumeRendering Module.
- Select a valid volume as the Source Volume
The Volume Rendering will be initialized. Have patience....


