Difference between revisions of "Projects:RegistrationLibrary:RegLib C01"
From NAMIC Wiki
| Line 3: | Line 3: | ||
[[Projects:RegistrationDocumentation:UseCaseInventory|Back to Registration Use-case Inventory]] <br> | [[Projects:RegistrationDocumentation:UseCaseInventory|Back to Registration Use-case Inventory]] <br> | ||
| − | ==Slicer Registration Use Case Exampe #2: Inter-subject Brain MRI: T1 | + | ==Slicer Registration Use Case Exampe #2: Inter-subject Brain MRI: axial T1 Tumor Growth AssessmentI== |
{| style="color:#bbbbbb; background-color:#333333;" cellpadding="10" cellspacing="0" border="0" | {| style="color:#bbbbbb; background-color:#333333;" cellpadding="10" cellspacing="0" border="0" | ||
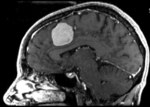
| − | |[[Image: | + | |[[Image:RegUC2_thumb_t0.png|150px|lleft|this is the fixed reference image. All images are aligned into this space]] |
|[[Image:Arrow_left_gray.jpg|100px|lleft]] | |[[Image:Arrow_left_gray.jpg|100px|lleft]] | ||
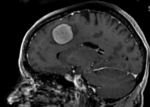
| − | |[[Image: | + | |[[Image:RegUC2_thumb_t1.png|150px|lleft|this is the moving image. The transform is calculated by matching this to the reference image]] |
| − | |||
|align="left"|LEGEND<br> | |align="left"|LEGEND<br> | ||
[[Image:Button_red_fixed.jpg|20px|lleft]] this indicates the reference image that is fixed and does not move. All other images are aligned into this space and resolution<br> | [[Image:Button_red_fixed.jpg|20px|lleft]] this indicates the reference image that is fixed and does not move. All other images are aligned into this space and resolution<br> | ||
[[Image:Button_green_moving.jpg|20px|lleft]] this indicates the moving image that determines the registration transform. <br> | [[Image:Button_green_moving.jpg|20px|lleft]] this indicates the moving image that determines the registration transform. <br> | ||
| − | |||
|- | |- | ||
|[[Image:Button_red_fixed.jpg|40px|lleft]] T1 SPGR | |[[Image:Button_red_fixed.jpg|40px|lleft]] T1 SPGR | ||
| | | | ||
|[[Image:Button_green_moving.jpg|40px|lleft]] T2 FLAIR | |[[Image:Button_green_moving.jpg|40px|lleft]] T2 FLAIR | ||
| − | |||
|- | |- | ||
| − | | | + | |0.9375 x 0.9375 x 1.4 mm isotropic<br> 256 x 256 x 112<br>RAS |
| | | | ||
| − | | | + | |0.9375 x 0.9375 x 1.2 mm<br> 256 x 256 x 130<br>RAS |
| − | |||
|} | |} | ||
===Objective / Background === | ===Objective / Background === | ||
Revision as of 19:36, 21 November 2009
Home < Projects:RegistrationLibrary:RegLib C01Back to ARRA main page
Back to Registration main page
Back to Registration Use-case Inventory
Contents
Slicer Registration Use Case Exampe #2: Inter-subject Brain MRI: axial T1 Tumor Growth AssessmentI
Objective / Background
This scenario occurs in many forms whenever we wish to align all the series from a single MRI exam/session into a common space. Alignment is necessary because the subject likely has moved in between series.
Keywords
MRI, brain, head, intra-subject, FLAIR, T1, defacing, masking, labelmap, segmentation
Input Data
 reference/fixed : T1 FLASH , 1x1x1 mm voxel size, sagittal, RAS orientation.
 moving: T2 1.2x1.2x1.2 mm voxel size, sagittal, RAS orientation.
 tag: segmentation labelmap obtained from FLAIR.
- Content preview: Have a quick look before downloading: Does your data look like this? [[Media:]] , [[Media:]]
- download dataset to load into slicer (~17 MB zip archive)
Registration Challenges
- as with all inter-subject registration, there is no perfect solution
- we have very diffferent amounts of initial misalignment.
- the intra-subject sequences are not aligned either
- the different series may have different FOV.
- the different series may have different resolution / voxel sizes.
Key Strategies
- the SPGR is the anatomical reference. It is also higher resolution. Unless there are overriding reasons, always use the highest resolution image as your fixed/reference.
- the defacing of the SPGR image introduces sharp edges that can be detrimental. Best to mask that area. If you have the mask available, use it. But in this case since we already have a skull-stripping mask as part of the labelmap, that is even better. We will load the labelmap and use it as mask in finding the registration
- because the two images are still reasonably similar in contrast, we can choose an intensity ratio as cost function, which is less stable but if successful provides a more precise alignment than mutual information.
Procedures
- download registration parameter presets file (load into slicer and run the registration)
- download/view guided video tutorial
- download power point tutorial
- download step-by step text instructions (text only)
Registration Results
- result transform file (load into slicer and apply to the target volume)
- result screenshots (compare with your results)
- result evaluations (metrics)

