Difference between revisions of "Projects:RegistrationLibrary:RegLib C44"
From NAMIC Wiki
| Line 82: | Line 82: | ||
[[Image:RegLib_C44_registered_Xf2.gif|400px|registered (after flipping axis and cropping volume)]] registered <br> | [[Image:RegLib_C44_registered_Xf2.gif|400px|registered (after flipping axis and cropping volume)]] registered <br> | ||
[[Image:RegLib_C44_registered_Xf3.gif|400px|registered (after flipping axis and cropping volume)]] registered <br> | [[Image:RegLib_C44_registered_Xf3.gif|400px|registered (after flipping axis and cropping volume)]] registered <br> | ||
| − | [[Image: | + | [[Image:RegLib_C44_deformOnly_Xf3.gif|400px|registered (after flipping axis and cropping volume)]] registered <br> |
===Download === | ===Download === | ||
Revision as of 14:16, 12 August 2011
Home < Projects:RegistrationLibrary:RegLib C44Back to ARRA main page
Back to Registration main page
Back to Registration Use-case Inventory
Contents
v3.6.3  Slicer Registration Library Case 44: Visible Human Pelvis CT
Input

|

|

|
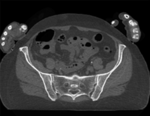
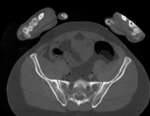
| baseline image | follow-up |
Modules
- Slicer 3.6.3 recommended modules: BRAINSFit
Objective / Background
This dataset contains CT of the visible human male and female pelvis. This serves as a test example for exploring non-rigid registration for inter-subject comparison from CT.
Keywords
CT, pelvis, visible human, inter-subject
Issues Challenges
Input Data
- fixed: CT , 0.6 x 0.6 x 0.40 mm voxel size, axial; 292 x 292 x 91 unsigned short image
- moving: CT , 0.6 x 0.6 x 0.40 mm voxel size, axial; 512 x 512 x 107 unsigned short image
Procedure / Pipeline
- Open case scene file or import image data: RegLib_C44_SlicerScene.mrml
- Overall strategy will be
- use vhm as fixed, vhf as moving volume
- because we're interested in the pelvic bone structure differences, we create a mask that will focus the registration on the skeletal region only.
- perform affine alignment
- using above affine alignment as starting point, perform low-level BSpline alignment
- To study the deformation only, extract the BSpline deformation from the transform, i.e. remove the affine portion. This can be done in a text editor, or by first resampling the vhf volume with the Affine before computing the BSpline.
- Visualize the deformation by applying the pure BSpline to a Projects:RegistrationDocumentation:UseCaseInventory:Auxiliary grid image
- Change colormap of deformed grid (e.g. hot), window and level to view the gridlines of interest, and overlay on the grayscale images
- Mask generation
- Go to the Editor module
- "Master Volume": select vhm
- A new labelmap "vhm-label" will be created
- Select "vhm" to be visible in the slice viewer
- Select the Threshold tool from the editor toolbar
- Adjust the lower threshold (slider bar) until most of the bone is highlighted, e.g. somewhere around an intensity value of 80. Leave the upper threshold unchanged at the max.
- Click Apply
- Morphologically clean the segmentation:
- Run a Median Filter with a 3x3x3 neighborhood to remove speckle noise
- Return to the Editor module and use the Change Island tool to remove the segmentation of the arms.
- Apply 2-3 rounds of morphological dilation to expand the region to include surrounding area.
- Rename the labelmap to "vhm_mask" or similar. You will find a "vhm_mask_dil" in the example dataset for comparison
- Repeat the above segmentation procedure for "vhf"
- Registration:
- 'Presets: for either of the registrations below, you can select the "BRAINSFit_...." presets from the parameter set menu instead of setting the parameters manually.
- Affine Registration
- Go to the BRAINSfit module
- select the following parameters:
- Fixed Image Volume: vhm Moving: vhf
- check boxes for Include Rigd registr. phase , Include ScaleVersor3D, include Affine
- Slicer Linear Transform: select "create new transform", rename to "Xf1_Affine" or similar
- leave rest at defaults. Click Apply
- registration should take ~ 10 secs.
- use fade slider to verify alignment; compare with result snapshots shown below. Alignment will not be perfect but should be better than before.
- BSpline Registration
- Go to the BRAINSfit module
- select the following parameters:
- Fixed Image Volume: vhm Moving: vhf
- Registration phases: from Initialize with previously generated transform', select "Xf2_..." node created before.
- Registration phases: check boxes for Include BSpline registration phase
- Output: Slicer BSpline transform: create new, rename to "Xf2_BSpline_msk" or similar
- Output Image Volume: create new, rename to "vhf_Xf2"; Pixel Type: "short"
- Registration Parameters: increase Number Of Samples to 200,000; Number of Grid Subdivisions: 7,7,7
- Control Of Mask Processing Tab: check ROI box, for Input Fixed Mask and Input Moving Mask select the two dilated labelmaps from above
- Leave all other settings at default
- click apply
Registration Results
 unregistered
 registered
 registered
 registered
 registered
Download
- Data
- Presets