Difference between revisions of "Projects:RegistrationLibrary:RegLib C02"
From NAMIC Wiki
| (7 intermediate revisions by the same user not shown) | |||
| Line 3: | Line 3: | ||
[[Projects:RegistrationDocumentation:UseCaseInventory|Back to Registration Use-case Inventory]] <br> | [[Projects:RegistrationDocumentation:UseCaseInventory|Back to Registration Use-case Inventory]] <br> | ||
| − | = <small> | + | = <small>updated for '''v4.1'''</small> [[Image:Slicer4_RegLibLogo.png|150px]] <br>Slicer Registration Library Case #02: Intra-subject Brain MR FLAIR to MR T1 = |
=== Input === | === Input === | ||
{| style="color:#bbbbbb; " cellpadding="10" cellspacing="0" border="0" | {| style="color:#bbbbbb; " cellpadding="10" cellspacing="0" border="0" | ||
| Line 23: | Line 23: | ||
|} | |} | ||
| − | === Modules === | + | === Slicer 4.1 Modules === |
| − | * | + | *[http://wiki.slicer.org/slicerWiki/index.php/Documentation/4.1/Modules/BRAINSFit General Registration (BRAINS)] |
| + | *[http://wiki.slicer.org/slicerWiki/index.php/Documentation/4.1/Modules/BRAINSResample Resample Image (BRAINS)] | ||
===Objective / Background === | ===Objective / Background === | ||
| Line 35: | Line 36: | ||
*Data: | *Data: | ||
**[[Media:RegLib_C02_Data.zip|'''Registration Library Case 02: MSBrain intra-subject multi-contrast''' <small> (Data, Presets & Solution Xforms, zip file 19 MB) </small>]] | **[[Media:RegLib_C02_Data.zip|'''Registration Library Case 02: MSBrain intra-subject multi-contrast''' <small> (Data, Presets & Solution Xforms, zip file 19 MB) </small>]] | ||
| − | * | + | *ScreenCast Movies: |
| − | **[[Media: | + | **[[Media:RegLib_C02_Registration.mov|registration via BRAINS<small> (quicktime movie 12 MB </small>]] |
| − | + | **[[Media:RegLib_C02_Resample.mov|resampling the labelmap with the computed affine transform<small> (quicktime movie 12 MB </small>]] | |
| − | |||
| − | |||
===Input Data=== | ===Input Data=== | ||
| Line 56: | Line 55: | ||
===Key Strategies=== | ===Key Strategies=== | ||
| − | |||
*we use an affine transform with 12 DOF (rather than a rigid one) to address distortion differences between the two protocols | *we use an affine transform with 12 DOF (rather than a rigid one) to address distortion differences between the two protocols | ||
*we choose the SPGR as the anatomical reference. Unless there are overriding reasons, always use the highest resolution image as your fixed/reference, to avoid loosing data through the registration. | *we choose the SPGR as the anatomical reference. Unless there are overriding reasons, always use the highest resolution image as your fixed/reference, to avoid loosing data through the registration. | ||
| − | |||
| − | |||
=== Procedures === | === Procedures === | ||
| − | ''' | + | *'''Phase I: register FLAIR to T1''' |
| − | # | + | #open the [http://wiki.slicer.org/slicerWiki/index.php/Documentation/4.1/Modules/BRAINSFit General Registration (BRAINS) module] |
| − | + | ##''Fixed Image Volume'': T1 | |
| − | # | + | ##''Moving Image Volume'': FLAIR |
| − | # | + | ##Output Settings: |
| − | # | + | ###''Slicer BSpline Transform": none |
| − | # | + | ###''Slicer Linear Transform'': create new transform, rename to "Xf1_Affine" |
| − | ## | + | ###''Output Image Volume'': create new volume, rename to "FLAIR_Xf1" |
| − | ## | + | ##''Registration Phases'': check boxes for ''Rigid'' and ''Affine'' |
| − | ## | + | ##''Main Parameters'': |
| − | ## | + | ###''Number Of Samples'': 200,000 |
| − | # | + | ##Leave all other settings at default |
| − | # | + | ##click: Apply; runtime < 10 sec (MacPro QuadCore 2.4GHz) |
| − | #click | + | *'''Phase II: Resample labelmap''' |
| − | + | #go to [http://wiki.slicer.org/slicerWiki/index.php/Documentation/4.1/Modules/BRAINSResample ''Resample Image (BRAINS)'' module] (in the Registration menu) | |
| − | + | ##''Image To Warp'': LesionSeg | |
| − | # | + | ##''Reference Image'': T1 |
| − | + | ##''Output Image'': create new & rename: LesionSeg_Xf1 | |
| − | '' | + | ##''Pixel Type'': uchar or binary |
| − | + | ##''Warp By Transform'': Xf1_Affine created in Phase I above | |
| − | # | + | ##''Interpolation Mode'': '''Nearest Neighbor''' |
| − | # | + | ##''Apply'' |
| − | + | #go to [http://wiki.slicer.org/slicerWiki/index.php/Documentation/4.1/Modules/Volumes ''Volumes''] module | |
| − | ## | + | ##''Active Volume'': LesionSeg_Xf1 |
| − | + | ##click/open the ''Volume Information'' tab | |
| − | ##'' | + | ##check the ''LabelMap'' checkbox. |
| − | ## | + | *more details in the ScreenCast movies in the download section above. |
| − | ## | ||
| − | |||
| − | |||
| − | |||
| − | ## | ||
| − | |||
| − | |||
| − | |||
| − | ''' | ||
| − | # | ||
| − | # | ||
| − | |||
| − | # | ||
| − | |||
| − | |||
| − | # | ||
| − | # | ||
| − | ## | ||
| − | ## | ||
| − | |||
| − | |||
| − | |||
| − | |||
=== Registration Results=== | === Registration Results=== | ||
[[Image:RegLib_C02_Unreg_AnimGif.gif|500px|Unregistered Data + segmentation labelmap]] unregistered <br> | [[Image:RegLib_C02_Unreg_AnimGif.gif|500px|Unregistered Data + segmentation labelmap]] unregistered <br> | ||
| − | [[Image: | + | [[Image:RegLib_C02_registered.gif|500px|Robust Multiresolution Registration Result: FLAIR + segmentation aligned with SPGR]] : registered w. Multiresolution affine <br> |
| − | |||
<br> | <br> | ||
Latest revision as of 13:36, 11 June 2012
Home < Projects:RegistrationLibrary:RegLib C02Back to ARRA main page
Back to Registration main page
Back to Registration Use-case Inventory
Contents
updated for v4.1 
Slicer Registration Library Case #02: Intra-subject Brain MR FLAIR to MR T1
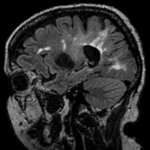
Input
|
|
|
| fixed image/target | moving image | |
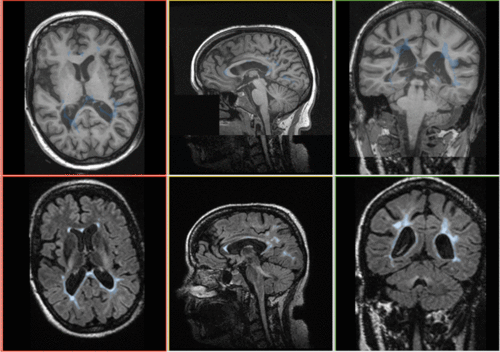
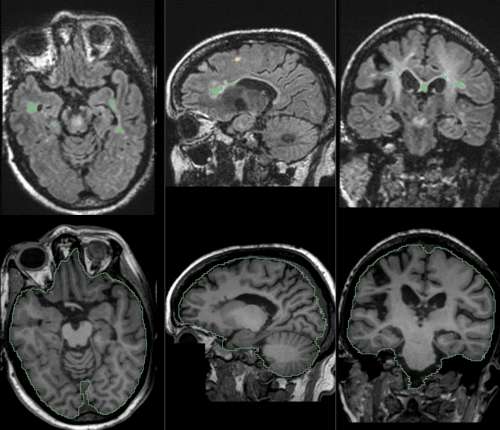
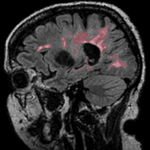
| resampled labelmap in reference space |

|
|
| result | resample | segmentation labelmap |
Slicer 4.1 Modules
Objective / Background
This scenario occurs in many forms whenever we wish to align all the series from a single MRI exam/session into a common space. Alignment is necessary because the subject likely has moved in between series. As additional files we have a labelmap for the moving image we need to move along .
Keywords
MRI, brain, head, intra-subject, FLAIR, T1, defacing, masking, labelmap, segmentation
Download
- Data:
- ScreenCast Movies:
Input Data
- reference/fixed : T1 SPGR , 1x1x1 mm voxel size, 256 x 256 x 146, sagittal,
- moving: T2 FLAIR 1.2x1.2x1.2 mm voxel size, sagittal
- tag: segmentation labelmap obtained from above FLAIR, to be resampled with result transform
Registration Challenges
- the amount of misalignment is small. Subject did not leave the scanner in between the two acquisitions, but we have some head movement.
- we know the underlying structure/anatomy did not change, but the two distinct acquisition types may contain different amounts of distortion
- the T1 high-resolution had a "defacing" applied, i.e. part of the image containing facial features was removed to ensure anonymity. The FLAIR is lower resolution and contrast and did not need this. The sharp edges and missing information in part of the image may cause problems.
- we have one or more label-maps attached to the moving image that we also want to align.
- the different series have different dimensions, voxel size and field of view. Hence the choice of which image to choose as the reference becomes important. The additional image data present in one image but not the other may distract the algorithm and require masking.
- hi-resolution datasets may have defacing applied to one or both sets, and the defacing-masks may not be available
- the different series have different contrast. The T1 contains good contrast between white (WM) and gray matter (GM) , and pathology appears as hypointense. The FLAIR on the other hand shows barely any WM/GM contrast and the pathology appears very dominantly as hyperintense.
Key Strategies
- we use an affine transform with 12 DOF (rather than a rigid one) to address distortion differences between the two protocols
- we choose the SPGR as the anatomical reference. Unless there are overriding reasons, always use the highest resolution image as your fixed/reference, to avoid loosing data through the registration.
Procedures
- Phase I: register FLAIR to T1
- open the General Registration (BRAINS) module
- Fixed Image Volume: T1
- Moving Image Volume: FLAIR
- Output Settings:
- Slicer BSpline Transform": none
- Slicer Linear Transform: create new transform, rename to "Xf1_Affine"
- Output Image Volume: create new volume, rename to "FLAIR_Xf1"
- Registration Phases: check boxes for Rigid and Affine
- Main Parameters:
- Number Of Samples: 200,000
- Leave all other settings at default
- click: Apply; runtime < 10 sec (MacPro QuadCore 2.4GHz)
- Phase II: Resample labelmap
- go to Resample Image (BRAINS) module (in the Registration menu)
- Image To Warp: LesionSeg
- Reference Image: T1
- Output Image: create new & rename: LesionSeg_Xf1
- Pixel Type: uchar or binary
- Warp By Transform: Xf1_Affine created in Phase I above
- Interpolation Mode: Nearest Neighbor
- Apply
- go to Volumes module
- Active Volume: LesionSeg_Xf1
- click/open the Volume Information tab
- check the LabelMap checkbox.
- more details in the ScreenCast movies in the download section above.
