Difference between revisions of "Projects:RegistrationLibrary:RegLib C30"
From NAMIC Wiki
| (2 intermediate revisions by the same user not shown) | |||
| Line 3: | Line 3: | ||
[[Projects:RegistrationDocumentation:UseCaseInventory|Back to Registration Use-case Inventory]] <br> | [[Projects:RegistrationDocumentation:UseCaseInventory|Back to Registration Use-case Inventory]] <br> | ||
| − | = <small> | + | = <small>updated for '''v4.1'''</small> [[Image:Slicer4_RegLibLogo.png|150px]] <br> Slicer Registration Library Case #30: Intra-subject Brain DTI = |
=== Input === | === Input === | ||
{| style="color:#bbbbbb; " cellpadding="10" cellspacing="0" border="0" | {| style="color:#bbbbbb; " cellpadding="10" cellspacing="0" border="0" | ||
| Line 26: | Line 26: | ||
=== Download === | === Download === | ||
| − | + | *[[Media:RegLib_C30_Data.zip|'''Registration Library Case 30 '''<small> (Data & Solution Xforms, incl. DTI, zip file 111 MB) </small>]] | |
| − | |||
=== Keywords === | === Keywords === | ||
Latest revision as of 20:54, 8 May 2012
Home < Projects:RegistrationLibrary:RegLib C30Back to ARRA main page
Back to Registration main page
Back to Registration Use-case Inventory
Contents
updated for v4.1 
Slicer Registration Library Case #30: Intra-subject Brain DTI
Input

|

|

|

|
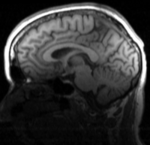
| fixed image/target T1 |
moving image 2a DTI baseline |
moving image 2b DTI tensor |
Slicer4 Modules used
Objective / Background
This is a common case of a DTI exam with no T2 available as structural reference and a T1 that has strong field inhomogeneity. We wish to spatially align the DTI to the anatomical reference scan (T1-SPGR).
Download
Keywords
MRI, brain, head, intra-subject, DTI, T1, non-rigid,
Input Data
- reference/fixed : T1 , 1x1x1.1 mm voxel size, 256 x 256 x 193
- moving: DTI baseline: 2.5 x 2.5 x 2.5 mm, 128 x 112 x 44
- moving DTI tensor: : 2.5 x 2.5 x 2.5 mm, 128 x 112 x 44 x 9 (tensor), original: DWI 256 x 256 x 41 x 36 directions
Registration Challenges
- The DTI sequence (EPI) has a low resolution, a clipped FOV and distortions we seek to correct via non-rigid alignment
- the DTI baseline is similar in contrast to a T2, but we have only a T1 as structural reference
Key Strategies
- the DWI needs to be converted to a DTI and a mask and baseline obtained
- to align the DTI with the T1 we need 2 preprocessing steps: 1. reduce the bias field inhomogeneity in the reference T1 and 2. obtain a skull-stripping / brain mask for the T1
- The DWI is already isotropic and hence no resampling is required before obtaining the DTI
- the DTI-T2 registration includes non-rigid deformation to correct for the strong distortions from the EPI acquisition. Because of the nonrigid component a mask of the brain parenchyma helps greatly in obtaining a meaningful transform.
- The DTI estimation provides an automated mask for the DTI_baseline scan, but we have no mask for the T1. We can either obtain one through separate segmentation or by sending the DTI_mask through an additional registration step. We use the former here.
- thus the full pipeline is this:
- Bias Field Correction of T1 -> T1_bc
- Skull Stripping of T1_bc
- DWI -> DTI estimation (incl. DTI_base and DT_mask output)
- Affine registration of DTI_baseline to T1_bc, unmasked
- non-rigid (BSpline) registration of DTI_baseline to T1_bc, masked, using above affine as starting pose
- resample DTI with result Affine+BSpline transform
Procedures
- Phase I: Preprocessing: Build DWI mask + baseline
- open the Modules:Diffusion:DiffusionWeightedImages:DiffusionWeightedVolumeMasking module
- Input DWI Volume: "DWI"
- Output Baseline Volume: Create New Volume, rename to "DWI_baseline"
- Output Threshold Mask: Create New Volume, rename to "DWI_mask"
- Leave other settings at default; click Apply
- Phase II: Preprocessing: Convert DWI -> DTI
- open "Diffusion Tensor Estimation" module (menu: Diffusion:DiffusionWeightedImages: DiffusionTensorEstimation)
- Input DWI Volume: DWI
- Output DTI Volume: create new, rename to "DTI"
- Output Baseline Volume: create new, rename to "DWI_baseline"
- Click: Apply
- Phase II: Bias Correction of T1
- The T1 image has strong intensity inhomogeneity from coil sensitivity. We need to correct this first
- open the Filtering : N4ITK MRI Bias Field Correction module
- Input Image: T1
- Mask Image: none
- Output Volume: create new volume, rename to T1_n4
- leave rest at defaults
- Click: Apply
- Phase III: Affine pre-registration
- open the General Registration (BRAINS) module
- Fixed Image Volume: T1_n4
- Moving Image Volume: DWI_baseline
- Output Settings:
- Slicer BSpline Transform": none
- Slicer Linear Transform: create new transform, rename to "Xf1_DWI-T1_Affine"
- Output Image Volume: create new volume, rename to "DWI_baseline_Xf1" (we use this for validation only)
- Registration Phases: check boxes for Rigid , Rigid+Scale and Affine
- Main Parameters:
- Number Of Samples: 200,000
- Mask Option: select ROIAUTO button
- (ROIAUTO) Output fixed mask: create new volume , rename to "T1_mask_ROIauto"
- (ROIAUTO) Output moving mask: create new volume, rename to "DWI_mask_ROIauto"
- Leave all other settings at default
- click: Apply; runtime < 1 min (MacPro QuadCore 2.4GHz)
- this should generate a first alignment and also 2 masks. We already have a DWI mask, so we care not about "DWI_mask_ROIauto", but we will use the T1_mask_ROIauto" output to edit/cleanup and use as mask in the subsequent nonrigid registration
- Phase IV: T1 mask
- open the Editor module
- select "T1_mask_ROIauto" as the volume to edit
- select the Erosion tool and click Apply until all of the segmented skull areas are removed
- select the Brush tool and manually fill in missing areas. Note that this need not be extremely accurate along the edges, since it will serve as a registration mask. To skip this step load the "T1_mask_edit.nrrd" file from the downloaded dataset.
- Phase V: Nonrigid Registration
- open the General Registration (BRAINS) module
- Fixed Image Volume: T1_n4
- Moving Image Volume: DWI_baseline
- Output Settings:
- Slicer BSpline Transform": create new transform, rename to "Xf2_DWI-T1_BSpline"
- Slicer Linear Transform: none
- Output Image Volume: create new volume, rename to "DWI_baseline_Xf2"
- Registration Phases: check boxes for BSpline only
- Main Parameters:
- Number Of Samples: 200,000
- B-Spline Grid Size: 5,5,5
- Mask Option: select ROI button
- ROI Masking input fixed: select " "T1_mask_ROIauto" or "T1_mask_edit" edited in phase III above
- ROI Masking input moving: select "DWI_mask" created in phase I above
- Leave all other settings at default
- click: Apply
- Phase VI: Resample DTI
- Open the Resample DTI Volume module (found under: All Modules)
- Input Volume: DTI
- Output Volume: select New DTI Volume, rename to DTI_Xf2
- Reference Volume: T1
- Transform Parameters:
- Transform Node: Xf2_DTI-T1
- check box: displacement
- Leave all other settings at defaults
- Click Apply; runtime 1-2 min.
- set T1_n4 as background and new DTI_Xf2 volume as foreground
- Set fade slider to see DTI overlay onto the T1 image. You should see something similar to the animated gif shown in the result section below.
