Difference between revisions of "Projects:RegistrationLibrary:RegLib C38"
From NAMIC Wiki
| Line 8: | Line 8: | ||
{| style="color:#bbbbbb; " cellpadding="2" cellspacing="0" border="0" | {| style="color:#bbbbbb; " cellpadding="2" cellspacing="0" border="0" | ||
|[[Image:RegLib_C38_Thumb1.png|100px]] | |[[Image:RegLib_C38_Thumb1.png|100px]] | ||
| − | |[[Image: | + | |[[Image:RegArrow_NonRigid.png|70px|lleft]] |
|[[Image:RegLib_C38_Thumb2.png|100px]] | |[[Image:RegLib_C38_Thumb2.png|100px]] | ||
|[[Image:RegLib_C38_Thumb3.png|100px]] | |[[Image:RegLib_C38_Thumb3.png|100px]] | ||
Revision as of 23:07, 8 March 2011
Home < Projects:RegistrationLibrary:RegLib C38Back to ARRA main page
Back to Registration main page
Back to Registration Use-case Inventory
Contents
v3.6.1  Slicer Registration Library Case 38: TBI
Input
|

|
|
|

|
|
|
|
|
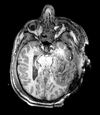
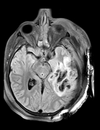
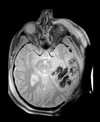
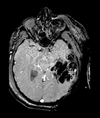
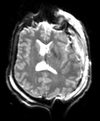
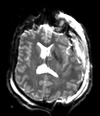
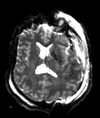
| T1pre | FLAIR | T1post | coronal T2 | SWI | EP50 | EP75 | EP100 |
Modules
- Slicer 3.6.1 recommended modules: BrainsFit
Download
Modules
- Slicer 3.6.1 recommended modules: BrainsFit
Objective / Background
We seek to align two exams (acute baseline and follow-up) as well as all series within exams into a common space for direct evaluation of regional change.
Input Data
- inter-exam
- reference/fixed : T1_e1 baseline exam of acute TBI , 512 x 512 x 160 ; 0.5 x 0.5 x 1 mm voxel size, axial acquisition, RAS orientation.
- moving:T1_e2 follow-up exam of acute TBI , 512 x 512 x 160 ; 0.5 x 0.5 x 1 mm voxel size, axial acquisition, RAS orientation.
- intra-exam
Registration Challenges
- extensive injury
- distortions on EPI images
- clipped FOV on T2
Key Strategies
- we first register the scans within each exam to the T1
Procedure Overview
Procedure
- Load & Center
- Load T1 MPRAGE datasets via Load Volume...
- volumes are note well centered, i.e. their physical origin defined in the image header differs; we therefore first center both images:
- Go to Volumes module, open Info tab
- From Active Volume menu, select each image in turn, then click the Center Image button
- note how Image origin changes for T1_e1 from 121,-97,-97 to 128,-128,-80 and for T1_e2 from 129,-106,-66 to 128,-128,-80
- now that both images have same center their initial misalignment can be seen by placing T1_e1 in the background and T1_e in the foreground and using the toggle-switch
- Align Exam 2 to Exam 1: T1 1st pass: unmasked
- Open Registration / BRAINSFit module
- Fixed Image: T1_e1, moving image: T1_e2
- Registration Phases: select "Initialize with CenterOfHeadAlign", Include Rigid, "IncludeScaleVersor3D" and Include Affine
- Output Settings: under SlicerLinear Transform, select "Create New Linear Transform, then select Rename" and rename it to Xf1_e2-e1_Affine
- Registration Parameters: increase the Number of Samples field to 200,000
- Leave all other settings at defaults & Click: Apply. Registration should complete within ~ 30 seconds
- Go back to the Data module: you should see the T1_e2 image moved under the newly created transform
- Select "T1_e1" as background and T2_e2 as new foreground, toggle to see alignment
- due to the strong deformations an affine alignment alone does not achieve a perfect match. We can extend the DOF to non-rigid BSpline transforms, but must be aware that doing so might remove differences of interest:
- Align Exam 2: 2nd pass: nonrigid
- Open Registration / BRAINSFit module
- Fixed Image: T1_e1, moving image: T1_e2
- From "Initialize with previously generated transform" & select the above affine Xf1_e2-e1_Affine
- Registration Phases: select only Include BSpline.
- Output Settings: under SlicerBSpline Transform, select "Create New BSpline Transform, then select Rename" and rename it to Xf2_e2-e1_BSpl
- Align Within Exams:
- Select Load Volume... and open the GRE, FLAIR and DWI images, respectively
- Open Registration / BRAINSFit module
- Select the presets Xf3... to Xf9... or use settings below:
- Registration phases: select Initialize with Center of Head Align, include rigid, include ScaleVersor3D and include Affine
- increase Number of Samples in Registration Parameters to 200,000
- Leave all other settings at defaults & Click: Apply. Registration should complete within 1 minute.
- choose a reference fixed image most similar in contrast to the moving image:
- for GRE,PD and FLAIR: use T1 as fixed directly
- for DWI: use PD as intermediate target, then nest the transforms: note that when registration finishes it places the moving image inside the newly created transform and the result becomes visible immediately. For the DWI-PD registration you must first drag the entire construct of the new transform and the DWI image inside it into the transform that holds the PD, otherwise you will not see the actual alignment.
- Fix Axis orientation:
- the PD dual echo and DWI images have flipped y-axis orientation, i.e. AP is read as PA. to fix this
- write the volume back out as NHDR format under a different name
- open the '.nhdr' file with a text editor and place a minus sign in front of the number of the second triplet indicating the y-axis in the space directions field:
space directions: (0.47,0,0) (0,0.47,0) (0,0,3)
- becomes
space directions: (0.47,0,0) (0,-0.47,0) (0,0,3)
- then save & close; and reopen in Slicer. Orientation should now be correct. Note that loading the images with the 'ignore file orientation box checked (Add Volume dialog) will produce the correct y-axis but a flipped x-axis.
Resampling
- use the Resample Scalar/Vector/DWI module (under Filtering) for all resampling
- the T1_e2 exam has 1 (affine or affine+BSpline) transform applied, all other images from the second exam have 2 transforms, first an affine to the original position of T1_e2 and then to T1_e1.
- if the e2-e1 transform is an affine also, we can combine all transforms beforehand (via the Harden Transforms option in the Data module)
- if the e2-e1 transform contains a BSpline, then we must resample twice, or venture into editing the transform file manually with a text editor. Resampling twice introduces some additional blurring from interpolation, but for most (qualitative) analyses the amount is negligible.