Difference between revisions of "Projects:RegistrationLibrary:RegLib C43"
m (Text replacement - "http://www.slicer.org/slicerWiki/index.php/" to "https://www.slicer.org/wiki/") |
|||
| Line 18: | Line 18: | ||
=== Modules === | === Modules === | ||
*Preprocessing | *Preprocessing | ||
| − | ** [ | + | ** [https://www.slicer.org/wiki/Modules:Editor-Documentation-3.6 Editor] |
| − | **[ | + | **[https://www.slicer.org/wiki/Modules:ModelMaker-Documentation-3.6 Model Maker] module |
| − | **[ | + | **[https://www.slicer.org/wiki/Modules:VotingBinaryHoleFilling-Documentation-3.6 Binary Hole Filling] module |
*Registration | *Registration | ||
| − | **'''Slicer 3.6.3 recommended modules: [ | + | **'''Slicer 3.6.3 recommended modules: [https://www.slicer.org/wiki/Modules:PythonSurfaceICPRegistration-Documentation-3.6 Surface Registration] module |
===Objective / Background === | ===Objective / Background === | ||
| Line 49: | Line 49: | ||
#Open case scene file or import image data: RegLib_C43_SlicerScene1.mrml | #Open case scene file or import image data: RegLib_C43_SlicerScene1.mrml | ||
#Preprocess segmentation for building surface models | #Preprocess segmentation for building surface models | ||
| − | ##we need to fill in the interior of the vertebral body, we use the morphological closing ([ | + | ##we need to fill in the interior of the vertebral body, we use the morphological closing ([https://www.slicer.org/wiki/Modules:Editor-Documentation-3.6 Editor]) and [https://www.slicer.org/wiki/Modules:VotingBinaryHoleFilling-Documentation-3.6 Binary Hole Filling] module |
| − | ##go to the [ | + | ##go to the [https://www.slicer.org/wiki/Modules:Editor-Documentation-3.6 Editor] |
###select "intact_CT" as master volume and "intact_seg" volume as label map to edit | ###select "intact_CT" as master volume and "intact_seg" volume as label map to edit | ||
###Select the ''Dilation'' tool, click on 8-neighbor checkbox for connectiviy, click ''Apply'' | ###Select the ''Dilation'' tool, click on 8-neighbor checkbox for connectiviy, click ''Apply'' | ||
###Select the ''Erosion'' tool, click on 8-neighbor checkbox for connectiviy, click ''Apply'' | ###Select the ''Erosion'' tool, click on 8-neighbor checkbox for connectiviy, click ''Apply'' | ||
| − | ##go to the [ | + | ##go to the [https://www.slicer.org/wiki/Modules:VotingBinaryHoleFilling-Documentation-3.6 Binary Hole Filling] module |
###Select the "intact_seg" volume as input | ###Select the "intact_seg" volume as input | ||
###Set Radius to 11,11,11 | ###Set Radius to 11,11,11 | ||
| Line 61: | Line 61: | ||
#repeat above preprocessing for the second segmentation "defect_seg" | #repeat above preprocessing for the second segmentation "defect_seg" | ||
#Build Surface Models | #Build Surface Models | ||
| − | ##go to the [ | + | ##go to the [https://www.slicer.org/wiki/Modules:ModelMaker-Documentation-3.6 Model Maker] module |
##Select preprocessed (see above) "intact_segfilled" as input volume | ##Select preprocessed (see above) "intact_segfilled" as input volume | ||
##Create a new model hierarchy that will contain both models | ##Create a new model hierarchy that will contain both models | ||
| Line 72: | Line 72: | ||
##click '' Apply'' | ##click '' Apply'' | ||
##Repeat for second labelmap "defect_segfilled" | ##Repeat for second labelmap "defect_segfilled" | ||
| − | ##go to [ | + | ##go to [https://www.slicer.org/wiki/Modules:Models-Documentation-3.6 Models] module |
##select both models and change the color by clicking on the ''Set Color..'' field | ##select both models and change the color by clicking on the ''Set Color..'' field | ||
##set Opacity slider for one of the models to ~0.8 | ##set Opacity slider for one of the models to ~0.8 | ||
#Surface Registration | #Surface Registration | ||
##Note that Surface Registration on Slicer version 3.6.3 on some platforms may not operate properly (as of Aug. 2011). '''Slicer v.3.6.4''' is recommended | ##Note that Surface Registration on Slicer version 3.6.3 on some platforms may not operate properly (as of Aug. 2011). '''Slicer v.3.6.4''' is recommended | ||
| − | ##go to [ | + | ##go to [https://www.slicer.org/wiki/Modules:PythonSurfaceICPRegistration-Documentation-3.6 Surface Registration]] module |
##''Landmark transform node'': select ''Rigid'' | ##''Landmark transform node'': select ''Rigid'' | ||
##Max. number of iterations: increase to 150 | ##Max. number of iterations: increase to 150 | ||
| Line 86: | Line 86: | ||
##''Output Transform'': select "New Transform", rename to "Xf1_defect-to-intact_Rigid" or similar | ##''Output Transform'': select "New Transform", rename to "Xf1_defect-to-intact_Rigid" or similar | ||
##click ''Apply'' | ##click ''Apply'' | ||
| − | #Go to the [ | + | #Go to the [https://www.slicer.org/wiki/Modules:Data-Documentation-3.6 Data module] |
##select the "defect_model" node and drag it inside the newly generated transform node | ##select the "defect_model" node and drag it inside the newly generated transform node | ||
##go to the 3D view and drag the mouse to force a display update. You should see the alignment of the two surfaces | ##go to the 3D view and drag the mouse to force a display update. You should see the alignment of the two surfaces | ||
##to resample: select ''Harden Transforms'' from the right-click popup menu associated with the model | ##to resample: select ''Harden Transforms'' from the right-click popup menu associated with the model | ||
| − | ##to resample image and labelmaps: drag into transform node and also select ''Harden Transforms'' , or use the dedicated [ | + | ##to resample image and labelmaps: drag into transform node and also select ''Harden Transforms'' , or use the dedicated [https://www.slicer.org/wiki/Modules:ResampleScalarVectorDWIVolume-Documentation-3.6 Resampling module] |
=== Registration Results=== | === Registration Results=== | ||
Latest revision as of 18:07, 10 July 2017
Home < Projects:RegistrationLibrary:RegLib C43Back to ARRA main page
Back to Registration main page
Back to Registration Use-case Inventory
Contents
v3.6.3  Slicer Registration Library Case 43: Surface registration of 3D vertebra models
Input
|

|
|
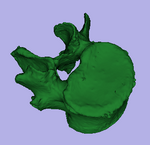
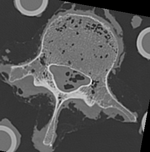
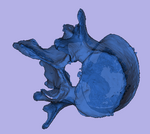
| baseline model | follow-up model: contains defect and is acquired in different orientation |
Modules
- Preprocessing
- Editor
- Model Maker module
- Binary Hole Filling module
- Registration
- Slicer 3.6.3 recommended modules: Surface Registration module
Objective / Background
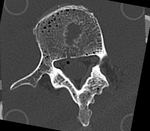
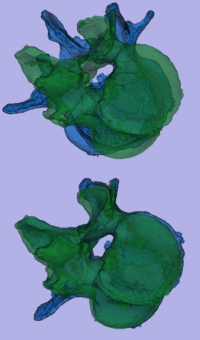
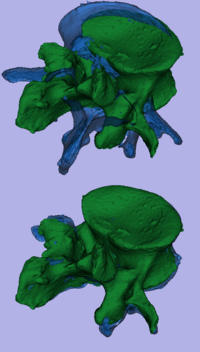
This dataset contains 3D modls obtained from in vitro CT of a human vertibral body segment (L4) before and after regional damage. Goal is to align the two models to study in detail the local changes that occurred and obtain estimates of structural integrity loss. Because the two orientations differ widely between acquisitions image-to-image registration has reduced robustness due to difficulty in initializing a good starting condition. Surface registration on the other hand is very robust toward strong difference in pose and he ce makes a good candidate for obtaining a fully automated first alignment.
Keywords
CT, spine cancer, vertebrae, surface registration, 3D models, model registration
Issues Challenges
- two images have very different spatial origins (as defined in original DICOM header): recenter first
- the initial segmentation obtained by thresh Leung the CT image is very sparse and not suitable for model generation as is. Morphological operators will have to be applied to generate a meaningful label map to build models from.
- the two models differ significantly in rotational alignment
Input Data
- fixed: segmented CT "intact_seg", 0.4 x 0.4 x 0.4 mm voxel size, axial; 284 x 262 x 148 unsigned short image
- moving: segmented CT "defect_seg", 0.5 x 0.5 x 0.50 mm voxel size, axial; 221 x 206 x 113 unsigned short image
Download
- Data
- Presets
Procedure / Pipeline
- Open case scene file or import image data: RegLib_C43_SlicerScene1.mrml
- Preprocess segmentation for building surface models
- we need to fill in the interior of the vertebral body, we use the morphological closing (Editor) and Binary Hole Filling module
- go to the Editor
- select "intact_CT" as master volume and "intact_seg" volume as label map to edit
- Select the Dilation tool, click on 8-neighbor checkbox for connectiviy, click Apply
- Select the Erosion tool, click on 8-neighbor checkbox for connectiviy, click Apply
- go to the Binary Hole Filling module
- Select the "intact_seg" volume as input
- Set Radius to 11,11,11
- Create a new output volume, rename to "intact_segfilled" or similar
- click Apply
- repeat above preprocessing for the second segmentation "defect_seg"
- Build Surface Models
- go to the Model Maker module
- Select preprocessed (see above) "intact_segfilled" as input volume
- Create a new model hierarchy that will contain both models
- Change model name to "intact_model1" or similar
- set Labels field to 1.
- uncheck the Skip Un-Named Labels box
- increase Smooth parameter to 50
- increase Decimate parameter to 0.35
- uncheck boxes for Split Normals, Point Normals, Pad
- click Apply
- Repeat for second labelmap "defect_segfilled"
- go to Models module
- select both models and change the color by clicking on the Set Color.. field
- set Opacity slider for one of the models to ~0.8
- Surface Registration
- Note that Surface Registration on Slicer version 3.6.3 on some platforms may not operate properly (as of Aug. 2011). Slicer v.3.6.4 is recommended
- go to Surface Registration] module
- Landmark transform node: select Rigid
- Max. number of iterations: increase to 150
- max. number of landmarks: increase to 500
- check box for start by matching centroids
- Input Surface: select "defect_model"
- Target Surface: select "intact_model"
- Output Transform: select "New Transform", rename to "Xf1_defect-to-intact_Rigid" or similar
- click Apply
- Go to the Data module
- select the "defect_model" node and drag it inside the newly generated transform node
- go to the 3D view and drag the mouse to force a display update. You should see the alignment of the two surfaces
- to resample: select Harden Transforms from the right-click popup menu associated with the model
- to resample image and labelmaps: drag into transform node and also select Harden Transforms , or use the dedicated Resampling module
Registration Results
 unregistered
 surface registration