Projects:RegistrationLibrary:RegLib C04
Back to ARRA main page
Back to Registration main page
Back to Registration Use-case Inventory
v3.6.1  Slicer Registration Library Case 04:
Intra-subject Brain MR of Multiple Sclerosis: Multi-contrast series for lesion change assessment
Input
|
|

|
|
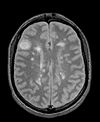
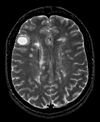
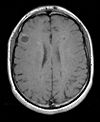
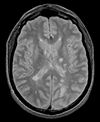
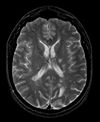
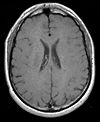
| exam 1: PD | exam 1: T2 | exam 1: T1-Gd | |

|
|||
|
|

|
|
| exam 2: PD | exam 2: T2 | exam 2: T1-Gd |
Modules
- Slicer 3.6.1 recommended modules: BrainsFit, Robust Multiresolution Affine
Objective / Background
This scenario occurs in many forms whenever we wish to assess change in a series of multi-contrast MRI. The follow-up scan(s) are to be aligned with the baseline, but also the different series within each exam need to be co-registered, since the subject may have moved between acquisitions. Hence we have a set of nested registrations. This particular exam features a dual echo scan (PD/T2), where the two structural scans are aligned by default. The post-contrast T1-GdDTPA scan however is not necessarily aligned with the dual echo. Also the post-contrast scan is taken with a clipped field of view (FOV) and a lower axial resolution, with 4mm slices and a 1mm gap (which we treat here as a de facto 5mm slice).
Download
- Registration Library Case 04: MS Multi-contrast series (PD,T2, T1-GdDTPA): Lesion change assessment (Data,Presets, Solution, zip file 17 MB)
- download Registration Presets (BrainsFit) (mrml file ,12kB)
- download tutorial
Link to User Guide: How to Load/Save Registration Parameter Presets
Keywords
MRI, brain, head, intra-subject, multiple sclerosis, MS, multi-contrast, change assessment, dual echo, nested registration
Input Data
- reference/fixed : PD.1 baseline exam , 0.9375 x 0.9375 x 3 mm voxel size, axial acquisition, RAS orientation.
- fixed T2.1 baseline exam , 0.9375 x 0.9375 x 3 mm voxel size, axial acquisition, RAS orientation. -> (aligned with PD.1, not used for registering)
- moving: T1.1 (GdDTPA contrast-enhanced scan) baseline exam 0.9375 x 0.9375 x 5 mm voxel size, axial acquisition.
- moving: PD.2 follow-up exam 0.9375 x 0.9375 x 3 mm voxel size, axial acquisition.
- moving: T2.2 follow-up exam 0.9375 x 0.9375 x 3 mm voxel size, axial acquisition. -> same orientation as PD2, will have same transform applied
- moving:T1.2-GdDTPA follow-up exam0.9375 x 0.9375 x 5 mm voxel size, axial acquisition. -> undergoes 2 transforms: first to PD.2, then to PD.1
Registration Challenges
- we have multiple nested transforms: each exam is co-registered within itself, and then the exams are aligned to eachother
- potential pathology change can affect the registration
- anisotropic voxel size causes difficulty in rotational alignment
- clipped FOV and low tissue contrast of the post-contrast scan
Key Strategies
- we first register the post-contrast scans within each exam to the PD
- second we register the follow-up PD scan to the baseline PD
- we also move the T2 exam within the same Xform
- we then nest the first alignment within the second
- because of the contrast differences and anisotropic resolution we use Mutual Information as cost function for better robustness
Procedure
- Load example dataset via OpenScene...
- Go to the Data module. You should see 6 images (e1_PD, e1_T2 etc.) and 3 solution transforms (Xform_...)
- Set background view to e1_PD and foreground to e2_PD. Toggle to see misalignment
- Align Exam 1:
- Open Registration / BRAINSFit module
- To set all parameters from presets, from the ParameterSet menu, select Gd1-PD1, else choose settings below:
- Fixed Image: e1_PD, moving image: e1_T1
- Registration Phases: select Include Rigid and Include Affine
- Output Settings: under SlicerLinear Transform, select "Create New Linear Transform, then select Rename" and rename it to MyXform_Gd1-PD1
- Registration Parameters: change the Number of Samples field to 200,000
- Leave all other settings at defaults
- Click Apply. Registration should complete within ~ 10 seconds
- Go back to the Data module: you should see the e1_T1Gd image moved under the newly created transform
- Select e1_T1Gd as new foreground, toggle to see alignment
- Align Exam 2:
- repeat the above steps for e2_PD as fixed and e2_T1Gd as moving
- To set all parameters from presets, from the ParameterSet menu, select Gd2-PD2
- Align Exam 2 with Exam 1:
- Open Registration / BRAINSFit module
- To set all parameters from presets, from the ParameterSet menu, select PD2-PD1, else choose settings below:
- Fixed Image: e1_PD, moving image: e2_PD
- Registration Phases: select Include Rigid and Include Affine
- Output Settings: under SlicerLinear Transform, select "Create New Linear Transform, then select Rename" and rename it to MyXform_PD2-PD1
- Registration Parameters: change the Number of Samples field to 200,000
- Leave all other settings at defaults
- Click Apply. Registration should complete within ~ 10 seconds
- Go back to the Data module: you should see the e2_PD image moved under the newly created transform
- Select e2_PD as new foreground, toggle to see alignment
- Combine Transforms:
- move e2_T2 inside the PD2-PD1 transform (same level as e2_PD)
- move XForm_Gd2-PD2 and the image inside (e2_T1Gd) inside the PD2-PD1 transform
- Select pairings as fore- and background and click toggle button to check alignment
- inparticular see if e2_T1Gd is aligned with e1_T1Gd
- Harden/Export results
- Select each registered image in turn, and from right-click menu select Harden Transform. Then immediately rename the node (via MRML Node Inspector below the MRLML tree tab) to distinguish from the original
- Select the Xform_Gd2-PD2 when inside the XForm-PD2-PD1 and also select 'Harden Transform. Then immediately rename to Xform_Gd2-PD1.
- Choose File/Save to save results.
Registration Results
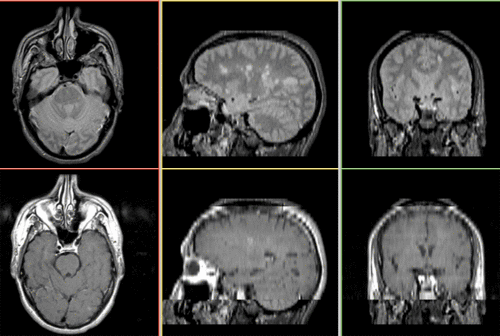 Unregistered baseline data: PD vs. T1Gd
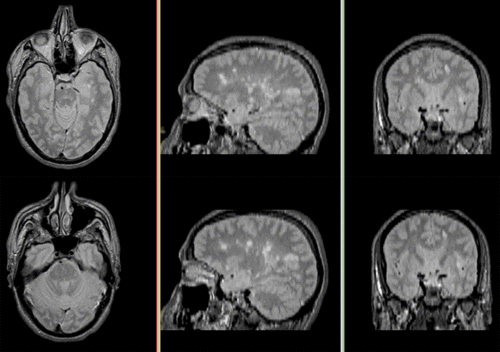 Unregistered followup data: PD exam 2 vs. exam 1
 Registered baseline data
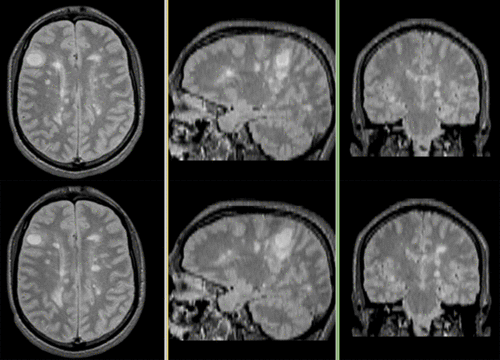 Registered followup data
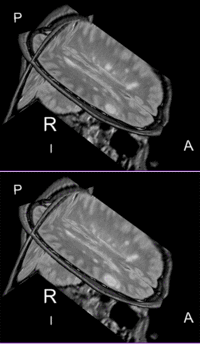 Lesion change visualization in 3D
 Lesion change via subtraction imaging of co-registered PD