Projects:RegistrationLibrary:RegLib C33
From NAMIC Wiki
Revision as of 20:09, 23 November 2010 by Meier (talk | contribs) (Created page with 'Back to ARRA main page <br> Back to Registration main page <br> [[Projects:RegistrationDocumentation:UseCaseInv…')
Home < Projects:RegistrationLibrary:RegLib C33v3.6.1
Back to ARRA main page
Back to Registration main page
Back to Registration Use-case Inventory
v3.6.1  Slicer Registration Library Exampe #33: Diffusion Weighted Image Volume: align with structural reference MRI
Input
|
|
|
|
|
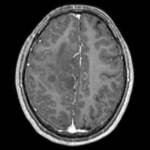
| fixed image/target T1 |
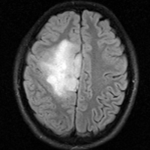
fixed image/target FLAIR |
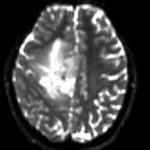
moving image 2a DTI baseline |
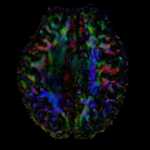
moving image 2b DTI tensor |
Modules
- Slicer 3.6.1 recommended modules: BrainsFit
Objective / Background
This is a typical example of DTI processing. Goal is to align the DTI image with a structural scan that provides accuracte anatomical reference. The DTI contains acquisition-related distortion and insufficient contrast to discern anatomical detail. For treatment planning and evaluation, location of functionally critical fiber tracts relative to the pathology is sought.
Keywords
MRI, brain, head, intra-subject, DTI, DWI
Input Data
- reference/fixed : T1 axial, 0.98 x 0.98 x 1 , 192 x 256 x 176
- reference/fixed : FLAIR axial, 0.4mm resolution in plane, 4mm slices, 448 x 512 x 30
- moving: Baseline image of acquired DTI volume, corresponds to T2w MRI , 1.96 x 1.96 x 3 mm voxel size, oblique, 128 x 128 x 40
- moving: Tensor data of DTI volume, oblique, same orientation as Baseline image. The result Xform will be applied to this volume. The original DWI has 64 directions, the extracted DTI volume has 9 scalars, i.e. 128 x 128 x 40 x 9
Overall Strategy
- Register FLAIR to T1 (affine) & resample
- Resample DWI to isotropic voxel size: use T1 as size reference
- Convert DWI -> DTI, incl. mask & baseline extraction
- Register DTI_baseline to FLAIR (affine+nonrigid) w/o masking
- Resample DTI with above transform
Procedures
- Phase I: register FLAIR to T1
- open Registration : BrainsFit module (presets: Xf1_FLAIR-T2)
- Registration Phases:
- set T1 as fixed and FLAIR as moving image
- select/check Include Rigid registration phase
- select/check Include Affine registration phase
- Output Settings:
- select a new transform "Output Transform", rename to "Xf1_FLAIR-T1"
- select a new volume "Output Image Volume, rename to "FLAIR_Xf1"
- Registration Parameters: increase Number Of Samples to 200,000
- Leave all other settings at default
- click: Apply; runtime < 1 min.
- click: Apply
- Phase II: Resample DWI to isotropic voxel size
- go to Filtering / Resample Scalar/Vector/DWI module
- Input Volume: "DWI", Reference Volume: "T1", Output Volume: "create new Diffusion Weighted Volume", rename to "DWI_iso"
- Click: Apply
- save new DWI_iso to disk
- depending on RAM of your machine, consider deleting the original DWI node
- Phase III: DWI -> DTI
- open "Diffusion Tensor Estimation" module
- Input DWI Volume: DWI_iso, Output DTI Volume: create new, rename to "DTI_iso"
- Output Baseline: create new, rename to "DTI_iso_base"
- Otsu Threshold Mask: create new, rename to "DTI_iso_mask"
- check box: "Estimation Parameters": "WLS"
- check boxes for Remove Islands and Apply Mask
- Click: Apply
- Phase IV: Register DTI (unmasked)
- open Registration : BrainsFit module (presets: Xf2_DTI-FLAIR_unmasked)
- Registration Phases:
- set FLAIR as fixed and DTI_iso_base as moving image
- select/check Include Rigid registration phase
- select/check Include Affine registration phase
- select/check Include BSpline registration phase
- Output Settings:
- select a new transform "Slicer BSpline Transform", rename to "Xf1_DTI-FLAIR_unmasked"
- select a new volume "Output Image Volume, rename to "DT_iso_base_Xf1"
- Registration Parameters: increase Number Of Samples to 200,000
- Registration Parameters: set Number Of Grid Subdivisions to 5,5,3
- Leave all other settings at default
- click: Apply; runtime < 1 min.
- Phase V: Resample DTI
- Open the Resample DTI Volume module (found under: All Modules)
- Input Volume: select DTI_iso
- Output Volume: select New DTI Volume, rename to DTI_iso_Xf2
- Reference Volume: select T1
- Transform Parameters: select transform "Xf2_DTI-FLAIR_unmasked
- check box: output-to-input
- Leave all other settings at defaults
- Click Apply; runtime ~ 3 min.
- Go to the Volumes module, select the newly produced DTI_Xf2 volume
- under the Display tab, select Color Orientation from the Scalar Mode menu
- set T1 as background and new DTI_Xf2 volume as foreground
- Set fade slider to see DTI overlay onto the T2 image
for more details see the tutorial(s) under Downloads above
Registration Results
Download
- Data
- Presets
- Documentation
Discussion: Registration Challenges
- The DTI contains acquisition-related distortions (commonly EPI acquisitions) that can make automated registration difficult.