Projects:RegistrationLibrary:RegLib C44
From NAMIC Wiki
Revision as of 21:03, 5 August 2011 by Meier (talk | contribs) (Created page with 'Back to ARRA main page <br> Back to Registration main page <br> [[Projects:RegistrationDocumentation:UseCaseInv…')
Home < Projects:RegistrationLibrary:RegLib C44
v3.6.3
Back to ARRA main page
Back to Registration main page
Back to Registration Use-case Inventory
Contents
v3.6.3  Slicer Registration Library Case 44: Visible Human Pelvis CT
Input

|

|

|
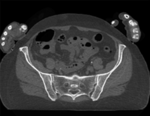
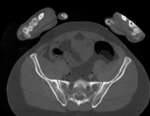
| baseline image | follow-up |
Modules
- Slicer 3.6.3 recommended modules: BRAINSFit
Objective / Background
This dataset contains CT of the visible human male and female pelvis. This serves as a test example for exploring non-rigid registration for inter-subject comparison from CT.
Keywords
CT, pelvis, visible human, inter-subject
Issues Challenges
Input Data
- fixed: CT , 0.6 x 0.6 x 0.40 mm voxel size, axial; 292 x 292 x 91 unsigned short image
- moving: CT , 0.6 x 0.6 x 0.40 mm voxel size, axial; 512 x 512 x 107 unsigned short image
Procedure / Pipeline
- Open case scene file or import image data: RegLib_C28_SlicerScene1.mrml
- Place T10intact and T10defect in back- and foreground respectively.
- Scroll through sagittal view and note the inverted axis orientation
- Flip axis
- Go to the Data module
- right-click on the Scene node and select "Insert Transform Node" from the menu
- select the newly created transform node, then in the MRML Node Inspector below, rename it to "Xf0_AxialFlip"
- select the "T10intact" node and drag it inside/on top of the "Xf0_AxialFlip" node
- ensure you have T10intact selected for background and the fade slider set on background (B) so you can see changes happening.
- Go to the Transforms module
- Select "Xf0_AxialFlip" from the Transform Node menu
- In the 4x4 matrix displayed, click in the field containing the "1.0000" in row 3 and column 3.
- hit Return key to activate editing
- change the number to -1. Hit Enter.
- you should see the image flip in the sagittal and coronal slice views
- Go to the Data module
- Crop Volumes
- Go to the Crop Volume module
- select "T10intact" as Input Volume; select "Create new MRML ROI Node" in the ROI menu, select "create new volume" in the Output Volume" menu
- you should see a small blue rectangle in all 3 views. Click in the views to expand the region to contain only the L4 vertebra (body and processes)
- when finished, click on Do ROI resample
- go to back to the Data module and change the name of the new "SubVolume" to "T10intact_crop"
- delete the ROI nodes (right click: delete node)
- repeat the same for the "T10defect" image
- Registration
- Go to the BRAINSfit module
- 'Presets: select the "BRAINSFit_Affine" from the parameter set menu. See here for a guide on how to Load/Save Registration Parameter Presets]]
- otherwise select the following parameters:
- Fixed Image Volume: :T10intact_crop ; Moving: T10defect_crop
- check boxes for "Moments align", Include Rigd registr. phase , Include ScaleVersor3D, include Affine
- Slicer Linear Transform: select "create new transform", rename to "Xf1_Affine" or similar
- leave rest at defaults. Click Apply
- registration should take ~ 10 secs.
- use fade slider to verify alignment; compare with result snapshots shown below.
- Go to the BRAINSfit module
Registration Results
 unregistered
 registered
 registered
 registered
registered (after flipping axis and cropping volume) registered
Download
- Data
- Presets