Projects:RegistrationLibrary:RegLib C07
From NAMIC Wiki
Home < Projects:RegistrationLibrary:RegLib C07
v3.6.3
Back to ARRA main page
Back to Registration main page
Back to Registration Use-case Inventory
Contents
v3.6.3  Slicer Registration Library Case #07: Prostate MRI follow-up
Input

|

|
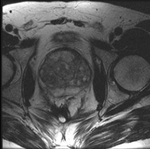
this is the time series of 2D images to be registered with the reference |
| fixed:prostate MRI day 1 |
moving:prostate MRI day 42 |
Modules
- Slicer 3.6.1 recommended modules: BrainsFit
Objective / Background
Evaluate changes
Keywords
MRI, prostate, follow-up
Input Data
- reference/fixed : axial MRI 256x256x36 ,0.7 x 0.7 x 4mm voxel size
- moving: axial MRI 256x256x20 ,0.8 x 0.8 x 5mm voxel size
Notes / Overall Strategy
- voxel size differs between the two images, also anisotropy is high: for the fine tuning a resampling to isotropic voxels for both volumes is recommended
- the large FOV includes a lot of additional image content that can be useful in constraining the alignment but also limits precision on the region of interest. Ev. cropping or masking to an ROI containing the prostate only is likely to improve the quality of the final registration
- the surface coils cause strong field inhomogeneity artifacts, apparent as strong intensity bias in both images. Bias correcion is recommended as preprocessing step.
- Overall strategy:
- Bias correction of both images
- Affine automated registration of Day42->Day1
- Low-level BSpline registration (5x5x3) on global image, using above affine as starting point
- Crop both images to prostate region only, resample to isotropic sizes
- and apply above registration to cropped version of Day42
- BSpline registration of cropped images only
- Reapply final transform to entire (uncropped image)
Procedures
- Phase I: Bias field correction
- load reference image and one moving image from the series
- open N4ITKBiasFieldCorrection module
- optional: select presets ("N4_Day1_axial" ) for module parameters from Parameter Set menu, or:
- select "Day01_axial" as input image, create new "Day1_axial_N4" output image
- set Iterations to 90,60,40
- set BSpline grid resolution to 2,2,1
- set Shrink factor to 3
- click Apply
- repeat above for the other image: "Day42_axial"
- Phase II: Affine Alignment
- go to BRAINSfit module
- Set parameters via presets: Parameter set menu: "BRAINSFit_Xf1_Affine", or manually choose parameters below:
- Select Fixed Image = Day01_axial_n4 and Moving Image as "Day42_axial_n4"
- check boxes to include "rigid","scale", "skew" and "affine" registration phases
- increaseNumber Of Samples to 300,000
- create new output transform from Slicer Linear Transform menu, rename to "Xf1_Affine" or similar
- click Apply
- compare results with those shown below
- Phase II: BSpline Alignment Level 1
- go to BRAINSfit module
- Set parameters via presets: Parameter set menu: "BRAINSFit_Xf2_BSpline", or manually choose parameters below:
- Select Fixed Image = Day01_axial_n4 and Moving Image as "Day42_axial_n4"
- check boxes to include "BSpline" registration phase only
- increaseNumber Of Samples to 300,000
- create new output transform from Slicer BSpline Transform menu, rename to "Xf2_BSpline" or similar
- create new output volume from Output Image Volume menu, rename to "Day42_n4_Xf2_BSpline" or similar
- set BSpline Grid size: Number of Grid Subdivisions" to 5,5,3
- click Apply
- compare results with those shown below
- Note that it is possible to do Phase I & II in a single step by also checking the "BSpline" phase box right away. However for pilot cases it is recommended to do them separately. If a combined registration fails it can be difficult to detect whether failure already occurred at the affine stage.
- Phase III: Cropping
- for a more refined alignment of the prostate only we first crop both images to the ROI only
- go to the Crop Volume module
- Input Volume, select "Day_01_axial_n4"
- ROI: select "New ROI"
- Output Volume: select "Create New Volume"
- You should see a blue box overlay in all 3 slice views. Click near the edges of the box to expand or contract it. In all 3 views place the box to enclose the prostate. Compare with results shown below.
- check the isotropic voxel size for output volume box
- click on Do ROI resample
- go to the Data module and rename the resampled output file to "Day_01_crop" or similar
- repeat above steps for "Day42_axial_n4"
- save your work
- Phase IV: BSpline Alignment Level 2
- you can now perform a second refined alignment on the cropped volumes only
- first resample the cropped volume with the initial BSpline above. Go to the ResampleScalarVectorDWIVolume module
- Select your ""Day42_cropped" volume as input volume and the above "Xf2_BSpline" as input transform
- select "Day01_cropped" as reference
- create new volume "Day42_crop_Xf2" as output volume
- check output-to-input box, if not selected already
- click Apply
- compare alignment of cropped volumes with results shown below
- go back to BRAINSfit module
- you can now run a second BSpline with "Day01_cropped" as fixed and "Day42_cropped_Xf2" as moving volume
- set BSpline grid to 5,5,5
- leave other settings as for Phase II above.
- click Apply
- compare alignment of cropped volumes with results shown below
- save your work
Registration Results
| unregistered | |
| registered Xf1: Affine only | |
| registered Xf2: Affine+BSpline | |
| cropping of prostate ROI | |
| registered Xf3: Second Level BSpline on cropped and resampled images |
Download
- Data
Acknowledgments
Images from the Prostate MR Image Database (patient 1, exam 1).


