Projects:RegistrationLibrary:RegLib C04
Back to ARRA main page
Back to Registration main page
Back to Registration Use-case Inventory
updated for v4.1 
Slicer Registration Library Case 04: Multi-contrast brain MRI of Multiple Sclerosis
Input
|
|

|
|
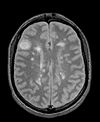
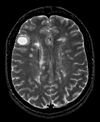
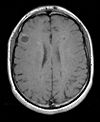
| exam 1: PD | exam 1: T2 | exam 1: T1-Gd | |

|
|||
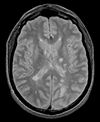
|
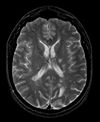
|

|
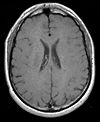
|
| exam 2: PD | exam 2: T2 | exam 2: T1-Gd |
Slicer 4.1 recommended Modules
- BrainsFit
- tutorials here are for the above module, but you may also use the Affine Registration or Expert Automated Registration modules.
Objective / Background
This scenario occurs in many forms whenever we wish to assess change in a series of multi-contrast MRI. The follow-up scan(s) are to be aligned with the baseline, but also the different series within each exam need to be co-registered, since the subject may have moved between acquisitions. Hence we have a set of nested registrations. This particular exam features a dual echo scan (PD/T2), where the two structural scans are aligned by default. The post-contrast T1-GdDTPA scan however is not necessarily aligned with the dual echo. Also the post-contrast scan is taken with a clipped field of view (FOV) and a lower axial resolution, with 4mm slices and a 1mm gap (which we treat here as a de facto 5mm slice). read more about this dataset here
Download
- Data:
- Documentation
- ScreenCast Video: loading data & inter-exam registration: aligning exam 2 to exam 1 (quicktime movie, 8 MB)
- ScreenCast Video: intra-exam registration: aligning T1Gd of exam 2 to PD of exam 2 (quicktime movie, 8 MB)
- ScreenCast Video: transform hierarchy: how to arrange the MRML data tree to properly reflect the mutual dependencies of transforms (quicktime movie, 2 MB)
Keywords
MRI, brain, head, intra-subject, multiple sclerosis, MS, multi-contrast, change assessment, dual echo, nested registration
Input Data
- reference/fixed : PD.1 baseline exam , 0.9375 x 0.9375 x 3 mm voxel size, axial acquisition, RAS orientation.
- fixed T2.1 baseline exam , 0.9375 x 0.9375 x 3 mm voxel size, axial acquisition, RAS orientation. -> (aligned with PD.1, not used for registering)
- moving: T1.1 (GdDTPA contrast-enhanced scan) baseline exam 0.9375 x 0.9375 x 5 mm voxel size, axial acquisition.
- moving: PD.2 follow-up exam 0.9375 x 0.9375 x 3 mm voxel size, axial acquisition.
- moving: T2.2 follow-up exam 0.9375 x 0.9375 x 3 mm voxel size, axial acquisition. -> same orientation as PD2, will have same transform applied
- moving:T1.2-GdDTPA follow-up exam0.9375 x 0.9375 x 5 mm voxel size, axial acquisition. -> undergoes 2 transforms: first to PD.2, then to PD.1
Registration Challenges
- we have multiple nested transforms: each exam is co-registered within itself, and then the exams are aligned to eachother
- potential pathology change can affect the registration
- anisotropic voxel size causes difficulty in rotational alignment
- clipped FOV and low tissue contrast of the post-contrast scan
Key Strategies
- we first register the post-contrast scans within each exam to the PD
- second we register the follow-up PD scan to the baseline PD
- we also move the T2 exam within the same Xform
- we then nest the first alignment within the second
- because of the contrast differences and anisotropic resolution we use Mutual Information as cost function for better robustness
Procedure
- there is a brief movie in the download section that shows this procedure step by step. Guides below use the General Registration (BRAINS) module, but you may also use the Affine Registration or Expert Automated Registration modules.
- Phase 1: register inter-exam exam 2 -> exam 1
- open the General Registration (BRAINS) module
- Fixed Image Volume: e1_PD
- Moving Image Volume: e2_PD
- Output Settings:
- Slicer BSpline Transform": none
- Slicer Linear Transform: create & rename new transform: Xf1_e21_Affine.tfm
- Output Image Volume: none
- Registration Phases: check boxes for Rigid and Affine
- Main Parameters
- Number of Samples: 200,000
- click: Apply; runtime < 1 min (MacPro QuadCore 2.4GHz)
- note that the Slicer4.1 version of BRAINS registration does not automatically place the moving volume inside the result transform, as it did for Slicer 3.6. In order to see the result, you must either go to the Data module and drag the moving volume inside the transform node, or select to generate a resampled Output Volume, as done above. The demo movie you can download here shows how to do this.
- Phase 2: register intra-examT1Gd to PD
- open the General Registration (BRAINS) module
- Fixed Image Volume: e1_PD
- Moving Image Volume: e1_T1Gd
- Output Settings:
- Slicer BSpline Transform": none
- Slicer Linear Transform: create & rename new transform: Xf2_e1-T1Gd_Rigid.tfm
- Output Image Volume: none
- Registration Phases: check boxes for Rigid only
- Main Parameters
- Number of Samples: 200,000
- click: Apply; runtime < 1 min (MacPro QuadCore 2.4GHz)
- note that the Slicer4.1 version of BRAINS registration does not automatically place the moving volume inside the result transform, as it did for Slicer 3.6. In order to see the result, you must either go to the Data module and drag the moving volume inside the transform node, or select to generate a resampled Output Volume, as done above. The demo movie you can download here shows how to do this.
- repeat for exam 2, i.e
- Fixed Image Volume: e2_PD
- Moving Image Volume: e2_T1Gd
- Slicer Linear Transform: create & rename new transform: Xf3_e2-T1Gd_Rigid.tfm
- Phase 3: organize transform hierarchies in the Data tree
- go to the Data module
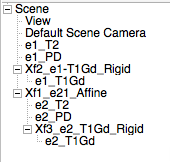
- drag the volume node e1_T1Gd onto the transform Xf2_e1-T1Gd_Rigid; let go of the mouse button when you see a hilight box appear around the transform node name
- drag the volume node e2_T1Gd onto the transform Xf3_e2-T1Gd_Rigid;
- drag the volume node e2_PD and e2_T2 onto the transform Xf1_e21_Affine.tfm
- drag the transform node Xf3_e2_T1Gd_Rigid.tfm onto the transform Xf1_e21_Affine.tfm
- your MRML data tree should look like the image on the right
- different images into fore- and background, respectively, and use the fade slider to shift between fore- and background to view the registration quality. You can also use OPTION+CMD key and drag the mouse to fade between back- and foreground.
- to apply the transform and lock in the new position, right click on the volume and select Harden Transform from the popup menu. The node will move back out to the main level. Note that this applies the transform to the physical orientation info in the image header and does not actually perform a resampling. It is recommended to not apply resampling until the very end of an analysis pipeline, to avoid interpolation-related data loss. To perform a resampling follow steps below:
- Phase 4: Resampling (optional)
- go to Resample Image (BRAINS) module (in the Registration menu)
- Image To Warp: e2_PD
- Reference Image: e1_PD
- Output Image: create new & rename: e2_PD_Xf1
- Pixel Type: ushort
- Warp By Transform: Xf1_e21_Affine created in Phase I above
- Interpolation Mode: linear
- note to avoid multiple resampling, combine the two nested transforms for the two volumes before performing the resampling step above. Alternatively you can execute the Harden Transform step above first and then resample the volume after, by giving no transform (i.e. resampling in place) but listing the fixed image (e.g. e1_PD) as reference. This will resample the moving image into the same representation as the reference.
before registration: 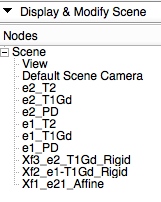 after registration:
Registration Results
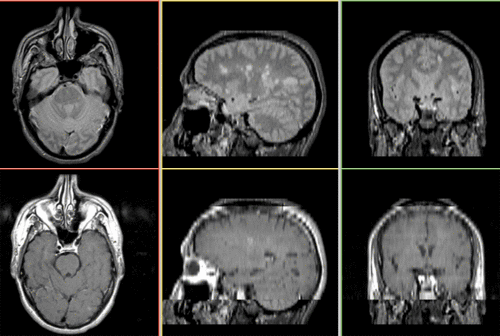 Unregistered baseline data: PD vs. T1Gd
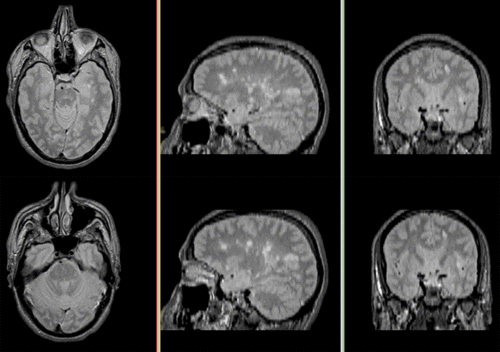 Unregistered followup data: PD exam 2 vs. exam 1
 Registered baseline data
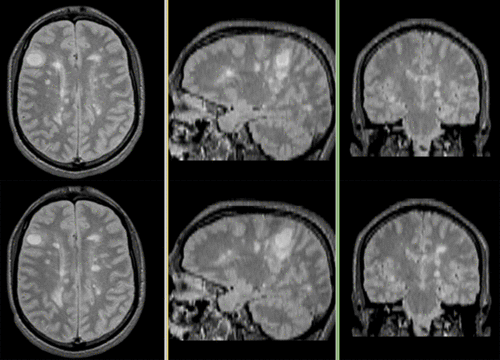 Registered followup data
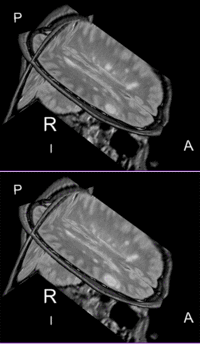 Lesion change visualization in 3D
 Lesion change via subtraction imaging of co-registered PD