Projects:RegistrationLibrary:RegLib C21
From NAMIC Wiki
Home < Projects:RegistrationLibrary:RegLib C21
v3.6.3
Back to ARRA main page
Back to Registration main page
Back to Registration Use-case Inventory
Contents
v3.6.3  Slicer Registration Library Case #21: Intra-subject knee MRI
Input

|

|

|
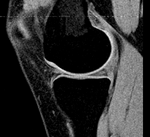
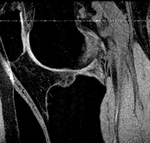
| fixed image/target | moving image |
Modules
- Slicer 3.6.3 recommended modules: BrainsFit,
Objective / Background
atlas building, priors, cartilage segmentation
Keywords
knee, MRI
Input Data
- reference/fixed : subject 58 MRI: 0.47 x 0.47 x 1.55 mm , 256 x 256 x 60; sagittal
- moving: subject 64 MRI: 0.55 x 0.55 x 1.5 mm , 256 x 256 x 60; sagittal
Download
- Data
Registration Results
 rigid
rigid
 rigid
rigid
 affine alignment
 BSpline registration of full volumes. 9 x 9 x 5 grid
Procedures
- Phase 1: rigid alignment
- Go to the BRAINSfit module
- select Presets "Xf1_Rigid" or set the parameters as given below:
- fixed image: "58_MRI", moving image: "64_MRI"
- Initialize with previous transform: select "Off"
- Initialize Transform Mode: check box for use MomentsAlign
- check Include Rigid registration Phase box.
- Output: under Slicer Linear Transform, select new and rename to "Xf1_Rigid" or similar
- Registration Parameters: set "Number of Samples" to 150,000 at least
- leave rest at defaults
- Click Apply
- Phase 2: affine alignment
- Go to the BRAINSfit module
- same as Phase 1 above, except:
- Initialize with previous transform: select "Xf1_Rigid" from phase 1 above
- Initialize Transform Mode: check box for Off
- check Include ScaleVersor" , "Include ScaleSkewVersor" and "Include Affine" registration Phase box.
- Registration Parameters: set "Number of Samples" to 200,000 at least
- Output: under Slicer Linear Transform, select new and rename to "Xf2_Affine" or similar
- Phase 3: Masking
- Before allowing nonrigid deformations we must mask the aliasing present:
- Go to the Editor module.
- Select 58_MRI as Master Volume, choose the threshold tool and threshold at intensity ~68 to separate from the background.
- Select the Brush tool and cut connections between the aliasing portions and the rest of the image
- Select Island Tool and remove aliasing portions
- Select Dilate tool to fill holes
- Save. Repeat for the 64_MRI volume
- Phase 4: BSpline alignment
- Go to the BRAINSfit module
- Initialize with previous transform: select "Xf2_Affine" from phase 2 above
- Output: under Slicer BSpline Transform, select new and rename to "Xf3_BSpline" or similar
- Output Image Volume: select new and rename to "64_MRI_Xf3" or similar
- Registration Parameters: set "Number of Samples" to 300,000 at least
- Number of Grid Subdivisions: 7,7,5
- Maximum B-Spline Displacement: set to 5 [mm]
- Masking: check ROI box, Input Fixed Mask: "58_MRI-label", Input Moving Mask: "64_MRI-label" generated in Phase 3 above.
- Click Apply
- Note to compare the different registrations: to see the Rigid or Affine registrations, drag the 64_MRI volume inside/onto the respective transform node. To see the BSpline registrations, select the "64_MRI_Xf3" volume as fore- or background.
Discussion: Registration Challenges
- inter-subject registration: content differences are large, as are relative limb positions
- aliasing: both MRIs have aliasing with part of the anatomy wrapping around to the other edge of the image. This needs to be masked for detailed registration
Discussion: Key Strategies
- to calculate the transform, we use the images with the most accurate geometric representation and the smallest expected change, i.e. we align the follow-up CT to the baseline CT and then apply the transforms to the PET image.
- because of the non-rigid differences due to posture and breathing we will need to apply a 2-step registration with an affine alignment followed by a BSpline.